SLAU292G November 2009 – July 2015
- Read This First
- 1eZ430-Chronos™ Overview
- 2Getting Started
-
3eZ430-Chronos Software
- 3.1 Overview
- 3.2
eZ430-Chronos Demo Software
- 3.2.1
Detailed Feature Overview - Modes Using the Top LCD Line
- 3.2.1.1 Time Mode
- 3.2.1.2 Alarm Mode
- 3.2.1.3 Temperature Mode
- 3.2.1.4 Altimeter Mode
- 3.2.1.5 Heart Rate Mode - RF Additional accessory or eZ430-Chronos Control Center heart rate simulation required.
- 3.2.1.6 Speed Mode - RF Additional accessory or eZ430-Chronos Control Center heart rate simulation required.
- 3.2.1.7 Tilt Mode
- 3.2.2
Detailed Feature Overview - Modes Using the Bottom LCD Line
- 3.2.2.1 Date Mode
- 3.2.2.2 Stopwatch Mode
- 3.2.2.3 Battery Voltage Mode
- 3.2.2.4 Acceleration Mode - RF
- 3.2.2.5 PowerPoint Mode - RF
- 3.2.2.6 Sync Mode - RF
- 3.2.2.7 Calorie/Distance Mode - RF Additional accessory or eZ430-Chronos Control Center heart rate simulation required.
- 3.2.2.8 Wireless Update - RF
- 3.2.1
Detailed Feature Overview - Modes Using the Top LCD Line
- 3.3 eZ430-Chronos Control Center PC Software
- 3.4 eZ430-Chronos Data Logger
- 3.5 Data Logger PC Software
- 3.6
eZ430-Chronos Software Projects
- 3.6.1 IDE Installation
- 3.6.2 eZ430-Chronos Software Flow
- 3.6.3 eZ430-Chronos Wireless Update Feature
- 3.6.4 eZ430-Chronos Firmware
- 3.6.5 eZ430-Chronos GUI Sources
-
4eZ430-Chronos Hardware
- 4.1 Programming the eZ430-Chronos Wrist Module: Disassembly and Assembly of the Housing
- 4.2 Functional Description of the eZ430-Chronos Wrist Module
- 4.3 Functional Description of the eZ430-Chronos RF Access Point
- 4.4 Functional Description of the eZ430-Chronos Debug Interface
- 4.5 Schematics, Layout, BOM, and LCD
- 4.6 Access Point Schematics, Layout, and BOM
- AFrequently Asked Questions
- BDetailed Hardware Driver Installation Guide
- Revision History
B.2 eZ430-Chronos RF Access Point
- The eZ430-Chronos access point USB drivers are included in the eZ430-Chronos installer package. A separate driver wizard window opens during installation as shown in Figure B-1. Continue by clicking next. A Windows warning may appear as the driver is not certified. Accept the driver installation.
- The driver installation wizard shows if the driver is successfully installed (see Figure B-2)
- Insert the access point.
- Windows detects the new hardware as TI CC1111 Low-Power RF to USB CDC Serial Port or eZ430-ChronosAP (see Figure B-3).
- Windows may open the Found New Hardware Wizard. If so, select No, not this time (see Figure B-5).
- Select Install the software automatically in next dialog (see Figure B-6).
- A Windows warning appears as the driver is not certified. Click Continue Anyway (see Figure B-7). The drivers are installed.
- The Windows Device Manager lists the device TI CC1111 Low-Power RF to USB CDC Serial Port (COMx) or eZ430-ChronosAP (COMx) in Ports (COM & LPT) (see Figure B-8).
- Verify correct properties of the port settings (see Figure B-10 and Figure B-11).
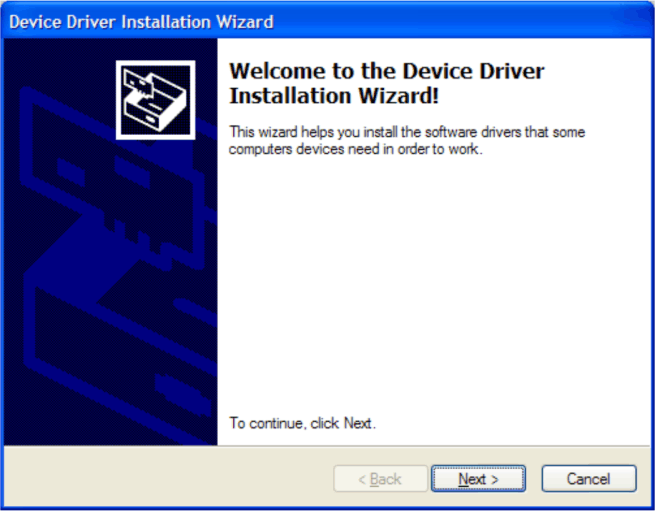 Figure B-1 Device Driver installation Wizard for the Access Point
 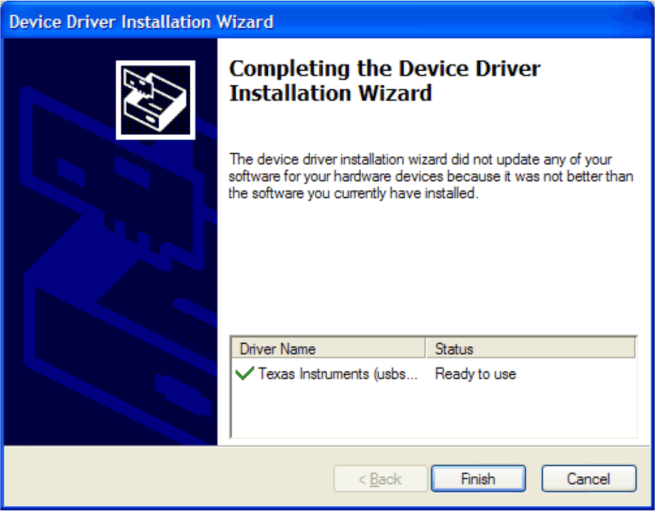 Figure B-2 Successful Driver Installation for Access Point
  Figure B-3 Access Point Detection for eZ430-Chronos With Black PCB
  Figure B-4 Access Point Detection for eZ430-Chronos With White PCB
 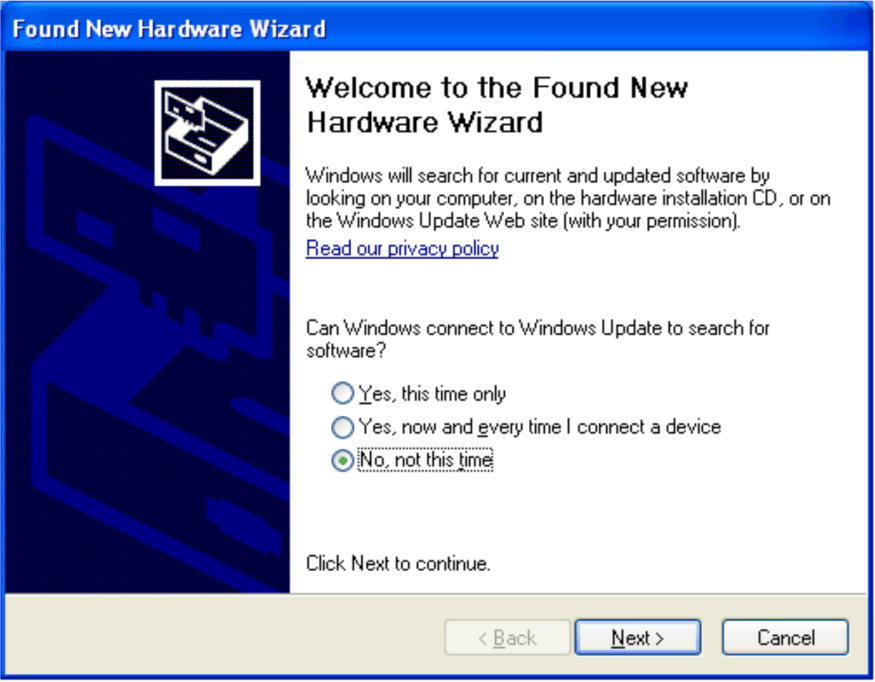 Figure B-5 Windows Found New Hardware Wizard
 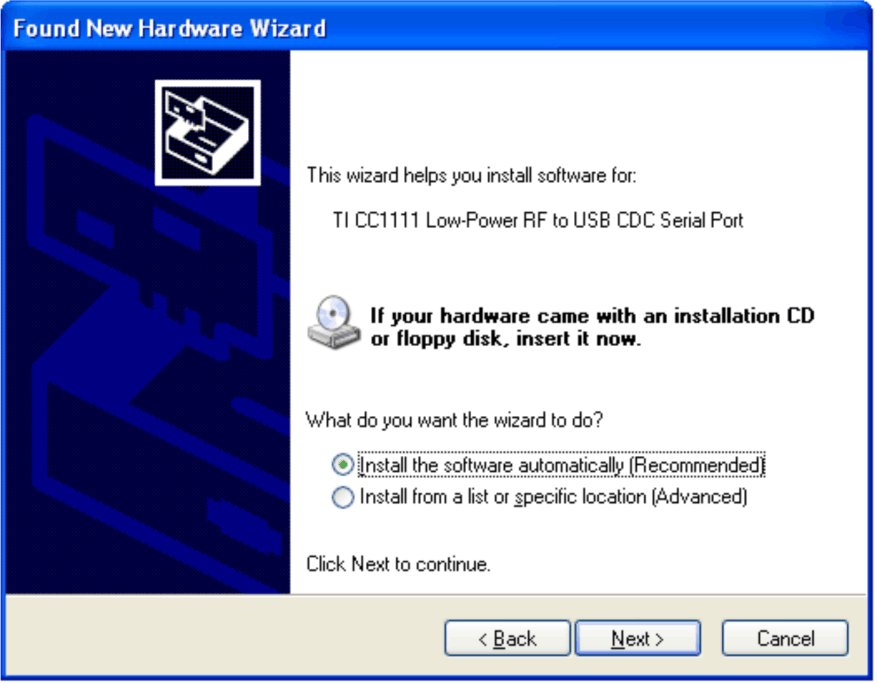 Figure B-6 Automatic Driver installation
 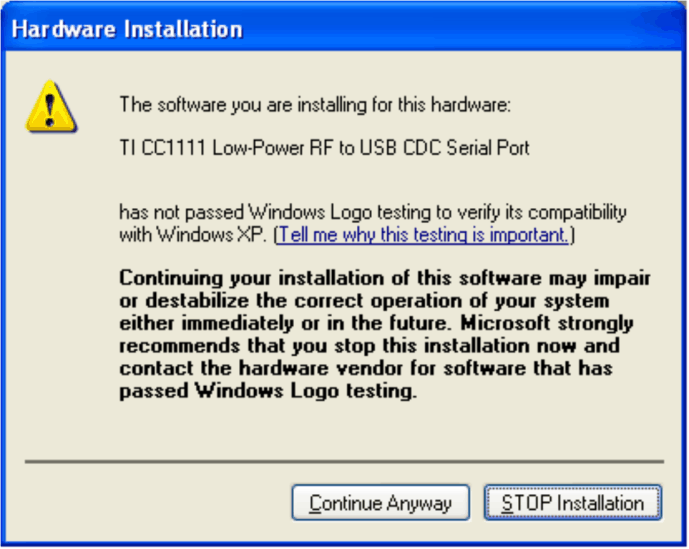 Figure B-7 Windows Uncertified Driver Installation Warning
 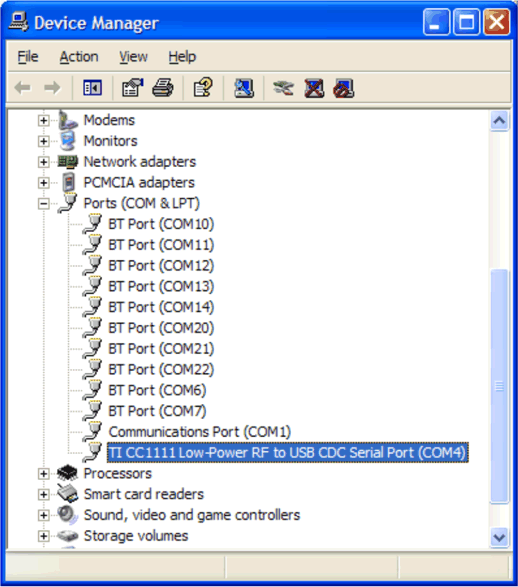 Figure B-8 Access Point in Windows Device Manager for eZ430-Chronos With Black PCB
 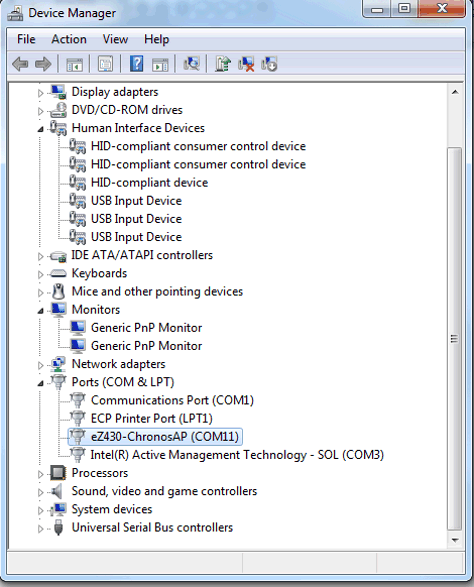 Figure B-9 Access Point in Windows Device Manager for eZ430-Chronos With White PCB
 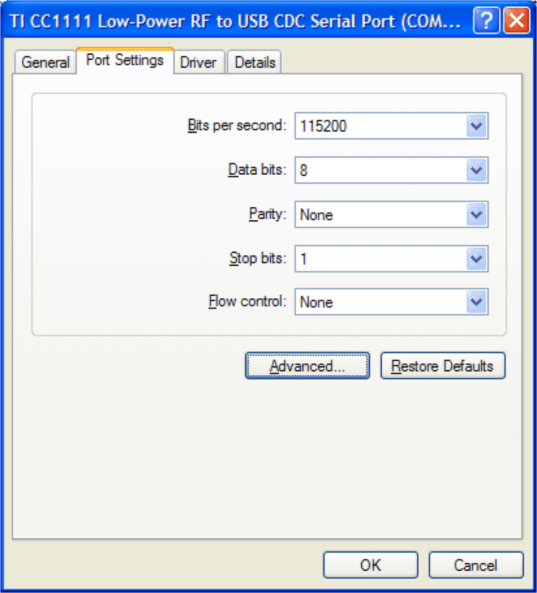 Figure B-10 Port Settings for eZ430-Chronos With Black PCB
 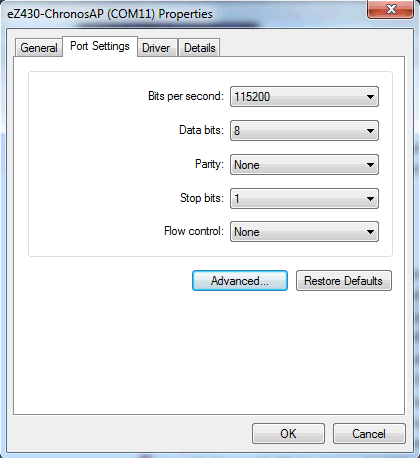 Figure B-11 Port Settings for eZ430-Chronos With White PCB