SWRU473A February 2017 – August 2018 CC3120MOD , CC3220MOD , CC3220MODA , CC3220R , CC3220S , CC3220SF
-
SimpleLinkrep%#8482; Wi-Fi® CC3220 Out-of-Box Application
- Trademarks
- 1 Introduction
- 2 Download and Installation
- 3 Installation for Basic Users
- 4 Building the Setup
- 5 Flashing the Out-of-Box Project
- 6 Getting Started With the OOB Demonstration
- 7 Troubleshooting
- 8 Limitations and Known Issues
- 9 Out-of-Box for Advance Users
- Revision History
6.1.1 CC3220 Provisioning
Using the SimpleLink Wi-Fi Starter Pro application, users can start AP provisioning or SmartConfig provisioning for a fast CC3220 connection. During this procedure, the AP credentials are decoded by the CC3220, and a profile is stored on the serial flash for future connections.
By default, the OOB application starts in provisioning mode. Provisioning mode is reflected by a flashing red LED (D7) once every 2 seconds. The terminal can also be used for extra debug messages. The Waiting to be Provisioned message appears when the device is ready to be provisioned.
The provisioning procedure for SmartConfig is described as follows.
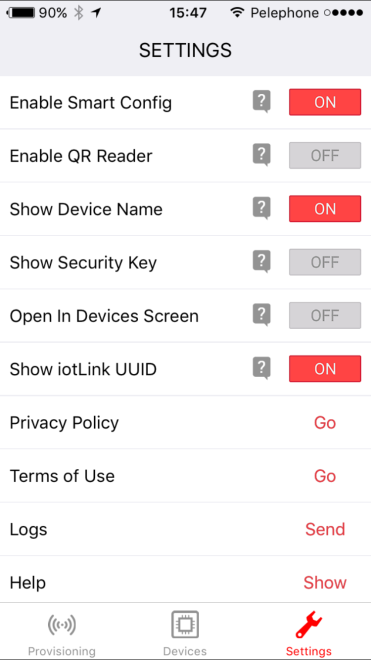
- Open the application and navigate to the Settings tab. Ensure the Enable Smart Config setting is set to ON (Smart Config is the preferred provisioning method, see Figure 15).
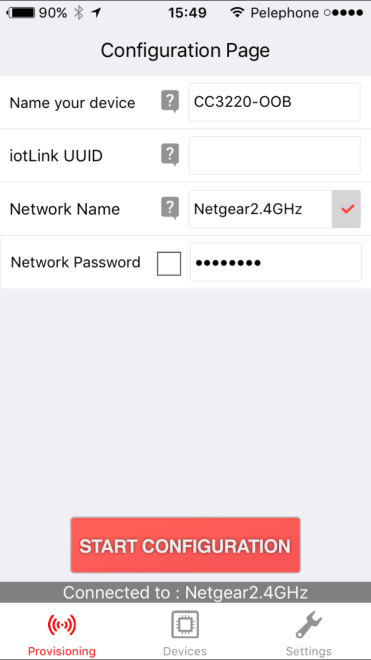
- Navigate to the provisioning tab to configure the AP credentials. Click on the START CONFIGURATION button to start the process (see Figure 16).
- Successful provisioning is indicated on the mobile application as shown in Figure 17, Figure 18, and Figure 19. On the LaunchPad, the red Led (D7) turns solid on.
 Figure 15. Wi-Fi Starter Settings Tab
  Figure 16. Wi-Fi Starter Provisioning Tab
 .png) Figure 17. Wi-Fi Starter Provisioning Process (1/3)
Figure 17. Wi-Fi Starter Provisioning Process (1/3) .png) Figure 18. Wi-Fi Starter Provisioning Process (2/3)
Figure 18. Wi-Fi Starter Provisioning Process (2/3) .png) Figure 19. Wi-Fi Starter Provisioning Process (3/3)
Figure 19. Wi-Fi Starter Provisioning Process (3/3) Additional LAN and OTA tabs are applicable only to the OOB and automatically open after provisioning is successfully completed. If these tabs do not show up, navigate to the Devices tab and select the device by pressing and holding it.