TIDUE59A May 2018 – September 2020
- Description
- Resources
- Features
- Applications
- 1System Description
-
2System Overview
- 2.1 Block Diagram
- 2.2 Design Considerations
- 2.3 Highlighted Products
- 2.4 System Design Theory
- 3Hardware, Software, Testing Requirements, and Test Results
- 4Design Files
- 5Software Files
- 6Related Documentation
- 7Terminology
- 8About the Author
- 9Revision History
3.1.2.3.1 Connect CC3220 to Network
When the example is run out-of-the-box, the example starts by first executing the provisioning process. BLE provisioning starts automatically, but the system can be switched to AP provisioning or SmartConfig by holding the switch on the right side of the CC3220S LaunchPad for 3 seconds.
- To provision the device using BLE provisioning, first download the SimpleLink SDK Explorer mobile application for Android or iOS. Then follow the instructions in the README.html for the ble_wifi_provisioning example of the SimpleLink SDK Bluetooth Plugin.
- To provision the device using AP provisioning or SmartConfig, download SimpleLink Starter Pro mobile application for Android or iOS. Then follow the instructions in the mobile application or see the instructions in Task 3 of the SimpleLink Academy Training for Wi-Fi Provisioning.
AP provisioning for the Wi-Fi doorlock demo has one main difference from the SimpleLink Academy training – the SimpleLink AP is password protected. When prompted by SimpleLink Starter Pro, enter 1234567890 as the security key, to connect to the mysimplelink-xxxxxx device. The default password (1234567890) is only intended to keep the demo simple and must be changed when implementing a real application to maintain security.
Multiple print statements are made to the terminal during provisioning. The device prints when a new profile is added, a successful connection to the AP is made, an IP address is acquired, and when the mobile device used to provision the CC3220 confirms that provisioning succeeded.
A default confirmation method is built into the AP provisioning and SmartConfig process, but the message can be changed by the developer for the final design. If a confirmation message is not received during AP provisioning or SmartConfig (even though the terminal shows that a profile was added and the device connects to the AP), the profile is still valid and stored on the device. Resetting the CC3220S-LaunchPad causes the application to restart and the device to attempt to connect to the stored profile.
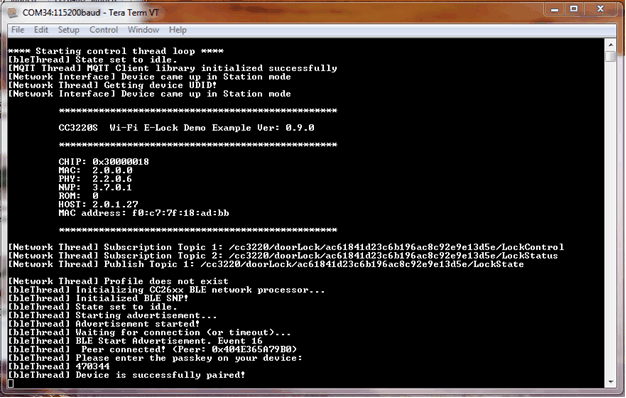
The first time BLE provisioning is run, the mobile device used to provision the TIDC-01005 system must pair with the system using BLE secure-simple pairing. When the mobile device first connects to the TIDC-01005 system over BLE, the device prompts the user to enter a key. The key needed to pair with the system is displayed in the terminal application running on the PC, as shown in Figure 3-9. Successfully entering the key allows the two devices to pair.
 Figure 3-9 BLE Secure-Simple Pairing Key Displayed in PC Terminal
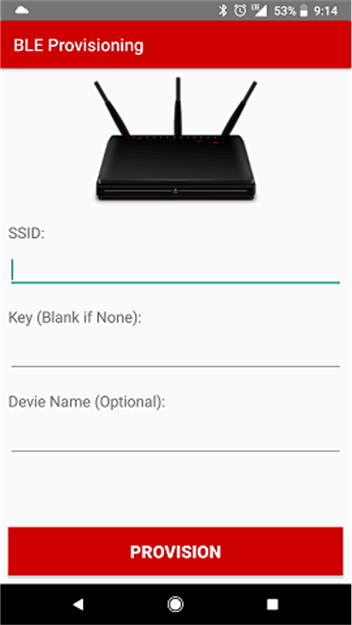
When paired, the user must enter the AP credentials in the SimpleLink SDK Explorer mobile application (see Figure 3-10) and then press the Provision button to send them to the system over BLE.
 Figure 3-10 SimpleLink™ SDK Explorer GUI For BLE Provisioning
When the credentials are successfully written, the CC3220S MCU reads them from the CC2640R2 over the NPI and tests the connection. If the connection succeeds and confirmation is successfully provided to the user, a profile is added to the CC3220S file system and used for the remainder of the application.
The CC3220S automatically connects to a profile on the file system for all subsequent restarts of the application.