TIDUE59A May 2018 – September 2020
- Description
- Resources
- Features
- Applications
- 1System Description
-
2System Overview
- 2.1 Block Diagram
- 2.2 Design Considerations
- 2.3 Highlighted Products
- 2.4 System Design Theory
- 3Hardware, Software, Testing Requirements, and Test Results
- 4Design Files
- 5Software Files
- 6Related Documentation
- 7Terminology
- 8About the Author
- 9Revision History
3.1.2.1.2 Use Premade UniFlash ImageCreator Project
To evaluate the software out-of-box using the premade UniFlash project, do the following:
- Download the CC3220 SDK and wifi_doorlock.zip (follow the instructions in Section 3.1.2.1 to install the wifi_doorlock demo).
- Open UniFlash, and select CC3120/CC3220 or the CC3220 LaunchPad.
- Select Start Image Creator (for CC3120/CC3220).
- Choose Manage Projects.
- Select Import Project from ZIP file.
- Navigate to the wifi_doorlock example in the CC3220 SDK, and select the zip file with the latest version in the uniflash folder (wifi_doorlock/uniflash/wifi_doorlock_RS_tirtos_<version>.zip).
- Locate the UniFlash project named wifi_doorlock_RS_tirtos in the list of Available Projects.
- Select Open Project.
- Connect to the CC3220S-LAUNCHXL by pressing the Connect button on the right-hand side.
- Press the Generate Image button (flame symbol on the right-hand side).
- Choose Program Image (Create & Program) at the top of the Generate Image page.
These steps result in the software application and all associated system files being written to the external serial flash of the CC3220S. The example, as provided in the UniFlash bundle, is designed to provide updates on the application state by printing debug messages to a serial terminal. To see the debug messages, open a serial terminal application on the computer that the LaunchPad is connected to, and connect to the COM port called XDS110 Class Application/User UART. Table 3-4 lists the settings for how the serial port is configured.
| SETTING | VALUE |
|---|---|
| Baud rate | 115200 |
| Data | 8 bit |
| Parity | — |
| Stop | 1 bit |
| Flow control | — |
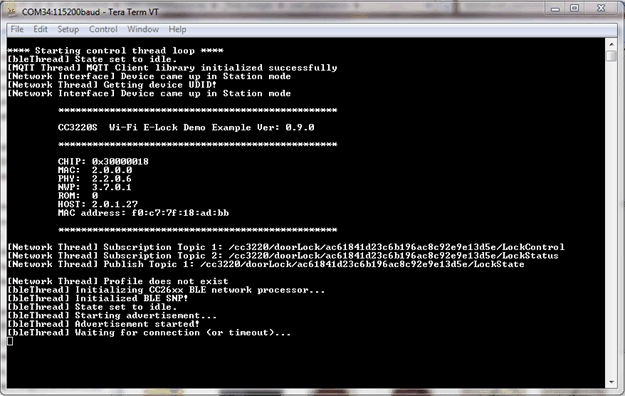
When successfully connected to the serial terminal, restart the CC3220S by pressing the RESET switch at the top of the CC3220S-LAUNCHXL. The application boots from the external serial flash and starts running. Upon a restart, the application checks to see if a network profile exists in the file system of the CC3220S. If a profile exists, the system automatically connects to the AP. Otherwise, the system waits to be provisioned over a Bluetooth low energy connection. Figure 3-8 shows the messages that appear in the terminal when the system starts up and waits to be provisioned.
 Figure 3-8 Debug Print Messages in Serial Terminal on First Application Start
To connect the device to a network and evaluate the rest of the application, see Section 3.1.2.3.1. When working with the premade UniFlash Image-Creator project, the system uses power-management by default.