SWRU580 April 2021 CC2564C , CC2564MODA , CC2564MODN
- Trademarks
- 1 Introduction
- 2 A2DP (AUD) Demo Guide
- 3 A3DP Sink Demo Guide
- 4 A3DP Source Demo Guide
- 5 HFP Demo Guide
- 6 HFP Audio Gateway Demo Guide
- 7 HID Demo Guide
- 8 HSP Demo Guide
- 9 Map Demo Guide
- 10PBAP Demo Guide
- 11SPP Demo Guide
- 12SPPLE Demo Guide
- 13SPPDMMulti Demo Guide
- 14ANP Demo Guide
- 15HFP Demo Guide
- 16HTP Demo Guide
- 17PASP Demo Guide
- 18HOGP Demo Guide
- 19PXP Demo Guide
- 20FMP Demo Guide
- 21CSCP Demo Guide
- 22Revision History
17.2 Demo Application
The demo application provides a description on how to use the demo application to connect two configured boards and communicate over Bluetooth LE. The included application registers a custom service on a board when the stack is initialized.
Device 1 (Server) setup on the demo application- To start with one of the devices has to have the Phone Alert Status running on it. It can be started by running RegisterPASS.
- Next, the device acting as a
Server needs to advertise to other devices. This can be done by issuing the
AdvertiseLE 1 command.
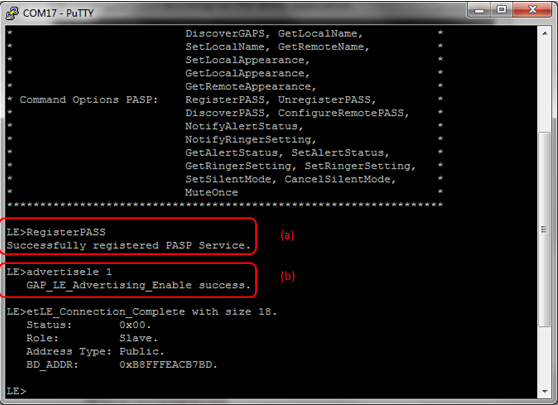 Figure 17-2 PASP Demo Register
PASS
- The Client LE device can try to find which LE devices are in the vicinity issuing the StartScanning command.
- Once you have found the device,
you can stop scanning by issuing the StopScanning command.
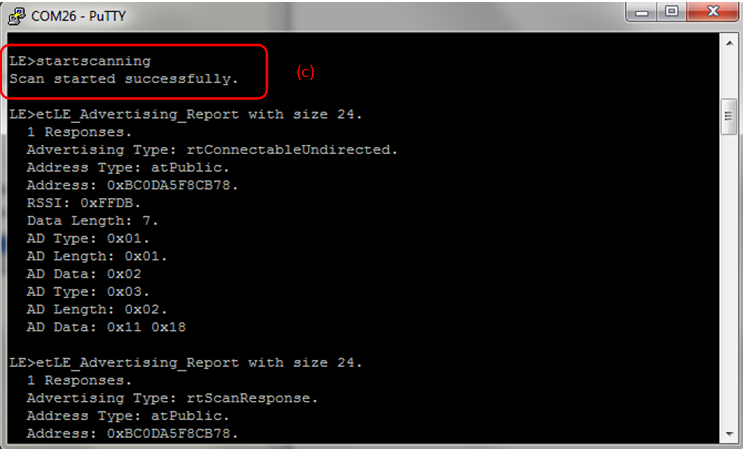 Figure 17-3 PASP Demo Start
Scanning
- Once the application on the
Client side knows the Bluetooth address of the device that is advertising, it
can connect to that device issuing the ConnectLE <Bluetooth Address>
command
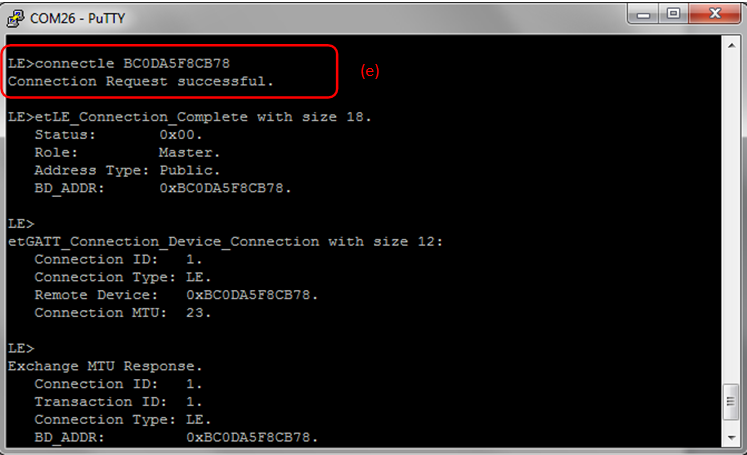 Figure 17-4 PASP Connection
Request Successful
 - After initialization, the Client
needs to find out whether PASS services are supported and what PASS features are
available. For this, issue the DiscoverPASS command on the Client. After the
service discovery operation is complete, the PASS Service Discovery Summary and
list of supported features is shown.
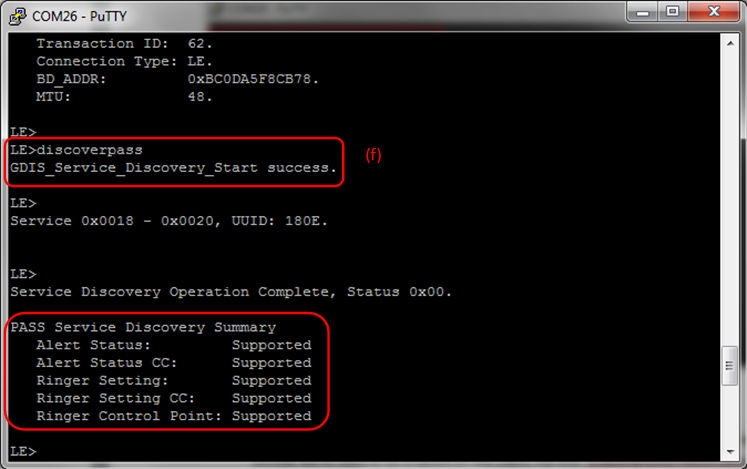 Figure 17-5 PASP Demo Discover
PASS
 - After getting the list of
supported features, the next step is to configure the PASS on the Client. We can
set the configuration for Alert Status Notify and Ringer Settings.
 Figure 17-6 PASP Demo Configure
Remote PASS
 - In this case, both Alert Status
Notify and Ringer Setting Notify are enabled by issuing the ConfigureRemotePASS
<Alert status notify> <Ringer Setting Notify>
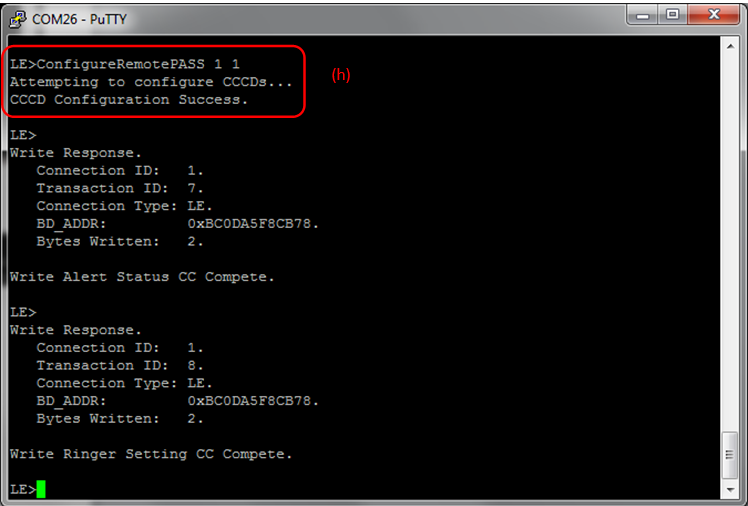 Figure 17-7 PASP Demo Configure
Remote PASS Result 2
- After configuring, The Phone
Alert System is now active. We can get the status of the Alert and Ringer by
issuing the NotifyAlertStatus and NotifyRingerSetting commands.
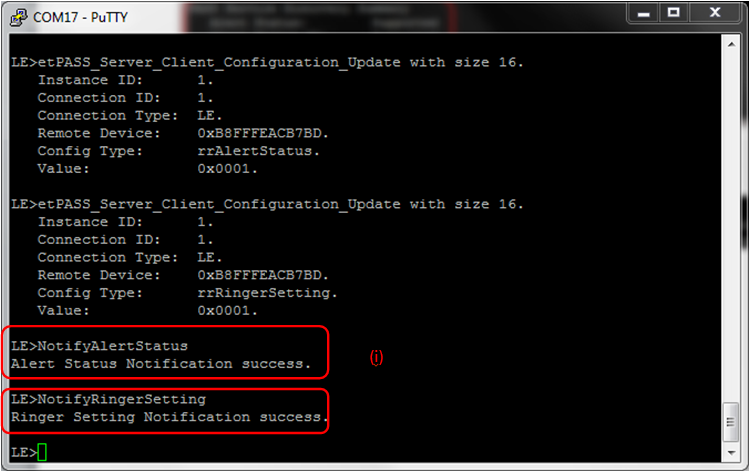 Figure 17-8 PASP Server Run
NotifyAlertStatus and NotifyRingerSetting
Figure 17-8 PASP Server Run
NotifyAlertStatus and NotifyRingerSettingAfter running NotifyAlertStatus and NotifyRingerSetting on the Server, we get the Alert Status and Ringer Setting on the Client.
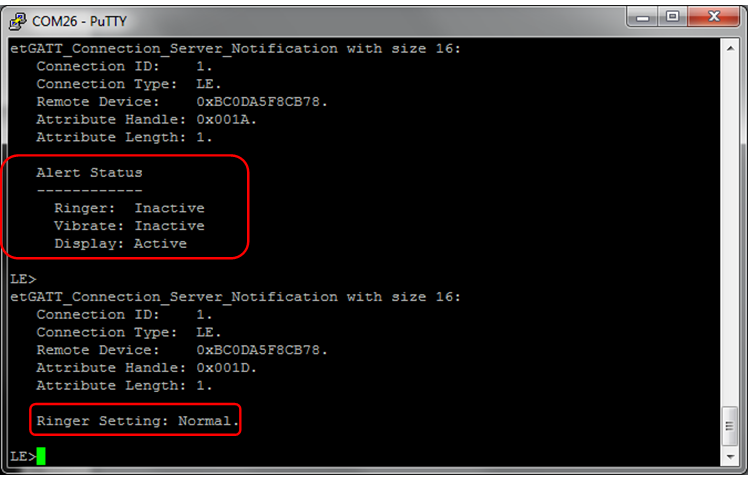 Figure 17-9 PASP Demo Alert Status
Notification
 - We can set the Alert Status for
each of the three options (Display, Vibrate and Ringer) by issuing the
SetAlertStatus <Ringer> <Vibrate> <Display> command and
setting each option either active or inactive.
 Figure 17-10 PASP Demo Set Alert
Status
Figure 17-10 PASP Demo Set Alert
StatusIn this example, we set all of them to active and then issue the NotifyAlertStatus command.
 Figure 17-11 PASP Demo Set Alert
Status Result
Figure 17-11 PASP Demo Set Alert
Status ResultThe Client will then receive the updated alert status.
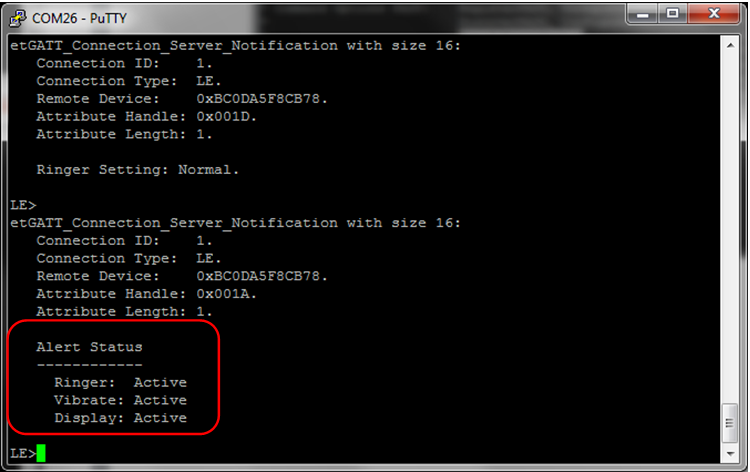 Figure 17-12 PASP Client Receive
Updated Alert Status
 - Similarly, we can toggle the
ringer setting between Silent and Normal through SetRingerSetting.
 Figure 17-13 PASP Demo Set Ringer
Setting Usage
Figure 17-13 PASP Demo Set Ringer
Setting UsageIn our example, we set toggle between Normal and Silent settings and update the setting by issuing the NotifyRingerSetting command.
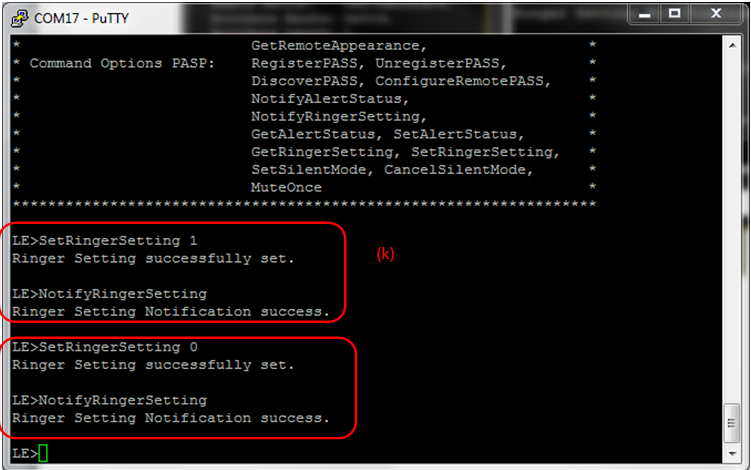 Figure 17-14 PASP Demo Set Ringer
Setting
Figure 17-14 PASP Demo Set Ringer
SettingThe Client sees the updated Ringer settings.
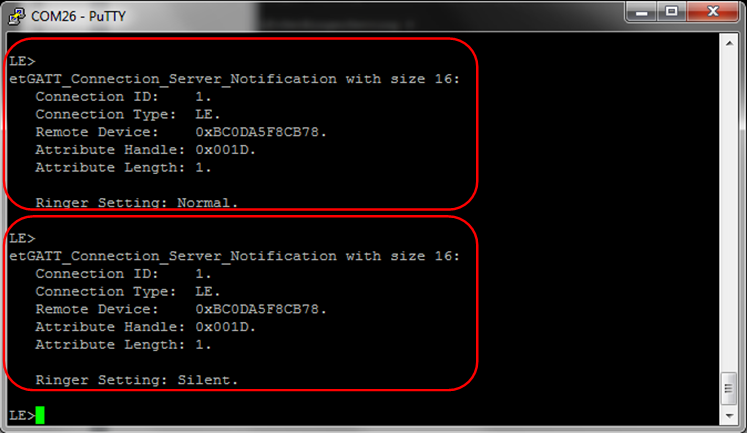 Figure 17-15 PASP Demo Connection
Server Notification
Figure 17-15 PASP Demo Connection
Server NotificationWe can also move the device into and out of silent mode by issuing the SetSilentMode and CancelSilentMode commands and Mute the device by issuing the MuteOnce command.