SWRU553A September 2019 – February 2020 AWR1243 , AWR2243
-
AWRx Cascaded Radar RF Evaluation Module (MMWCAS-RF-EVM)
- Trademarks
- 1 Getting Started
- 2 Hardware Description
- 3 Design Files and Software Tools
- 4 PCB Dimensions and Mounting Information
- 5 PCB Storage and Handling Recommendations
- 6 References
- 7 Regulatory Information
- Revision History
2.2 Attaching the MMWAVCAS-RF-EVM to the MMWAVCAS-DSP-EVM
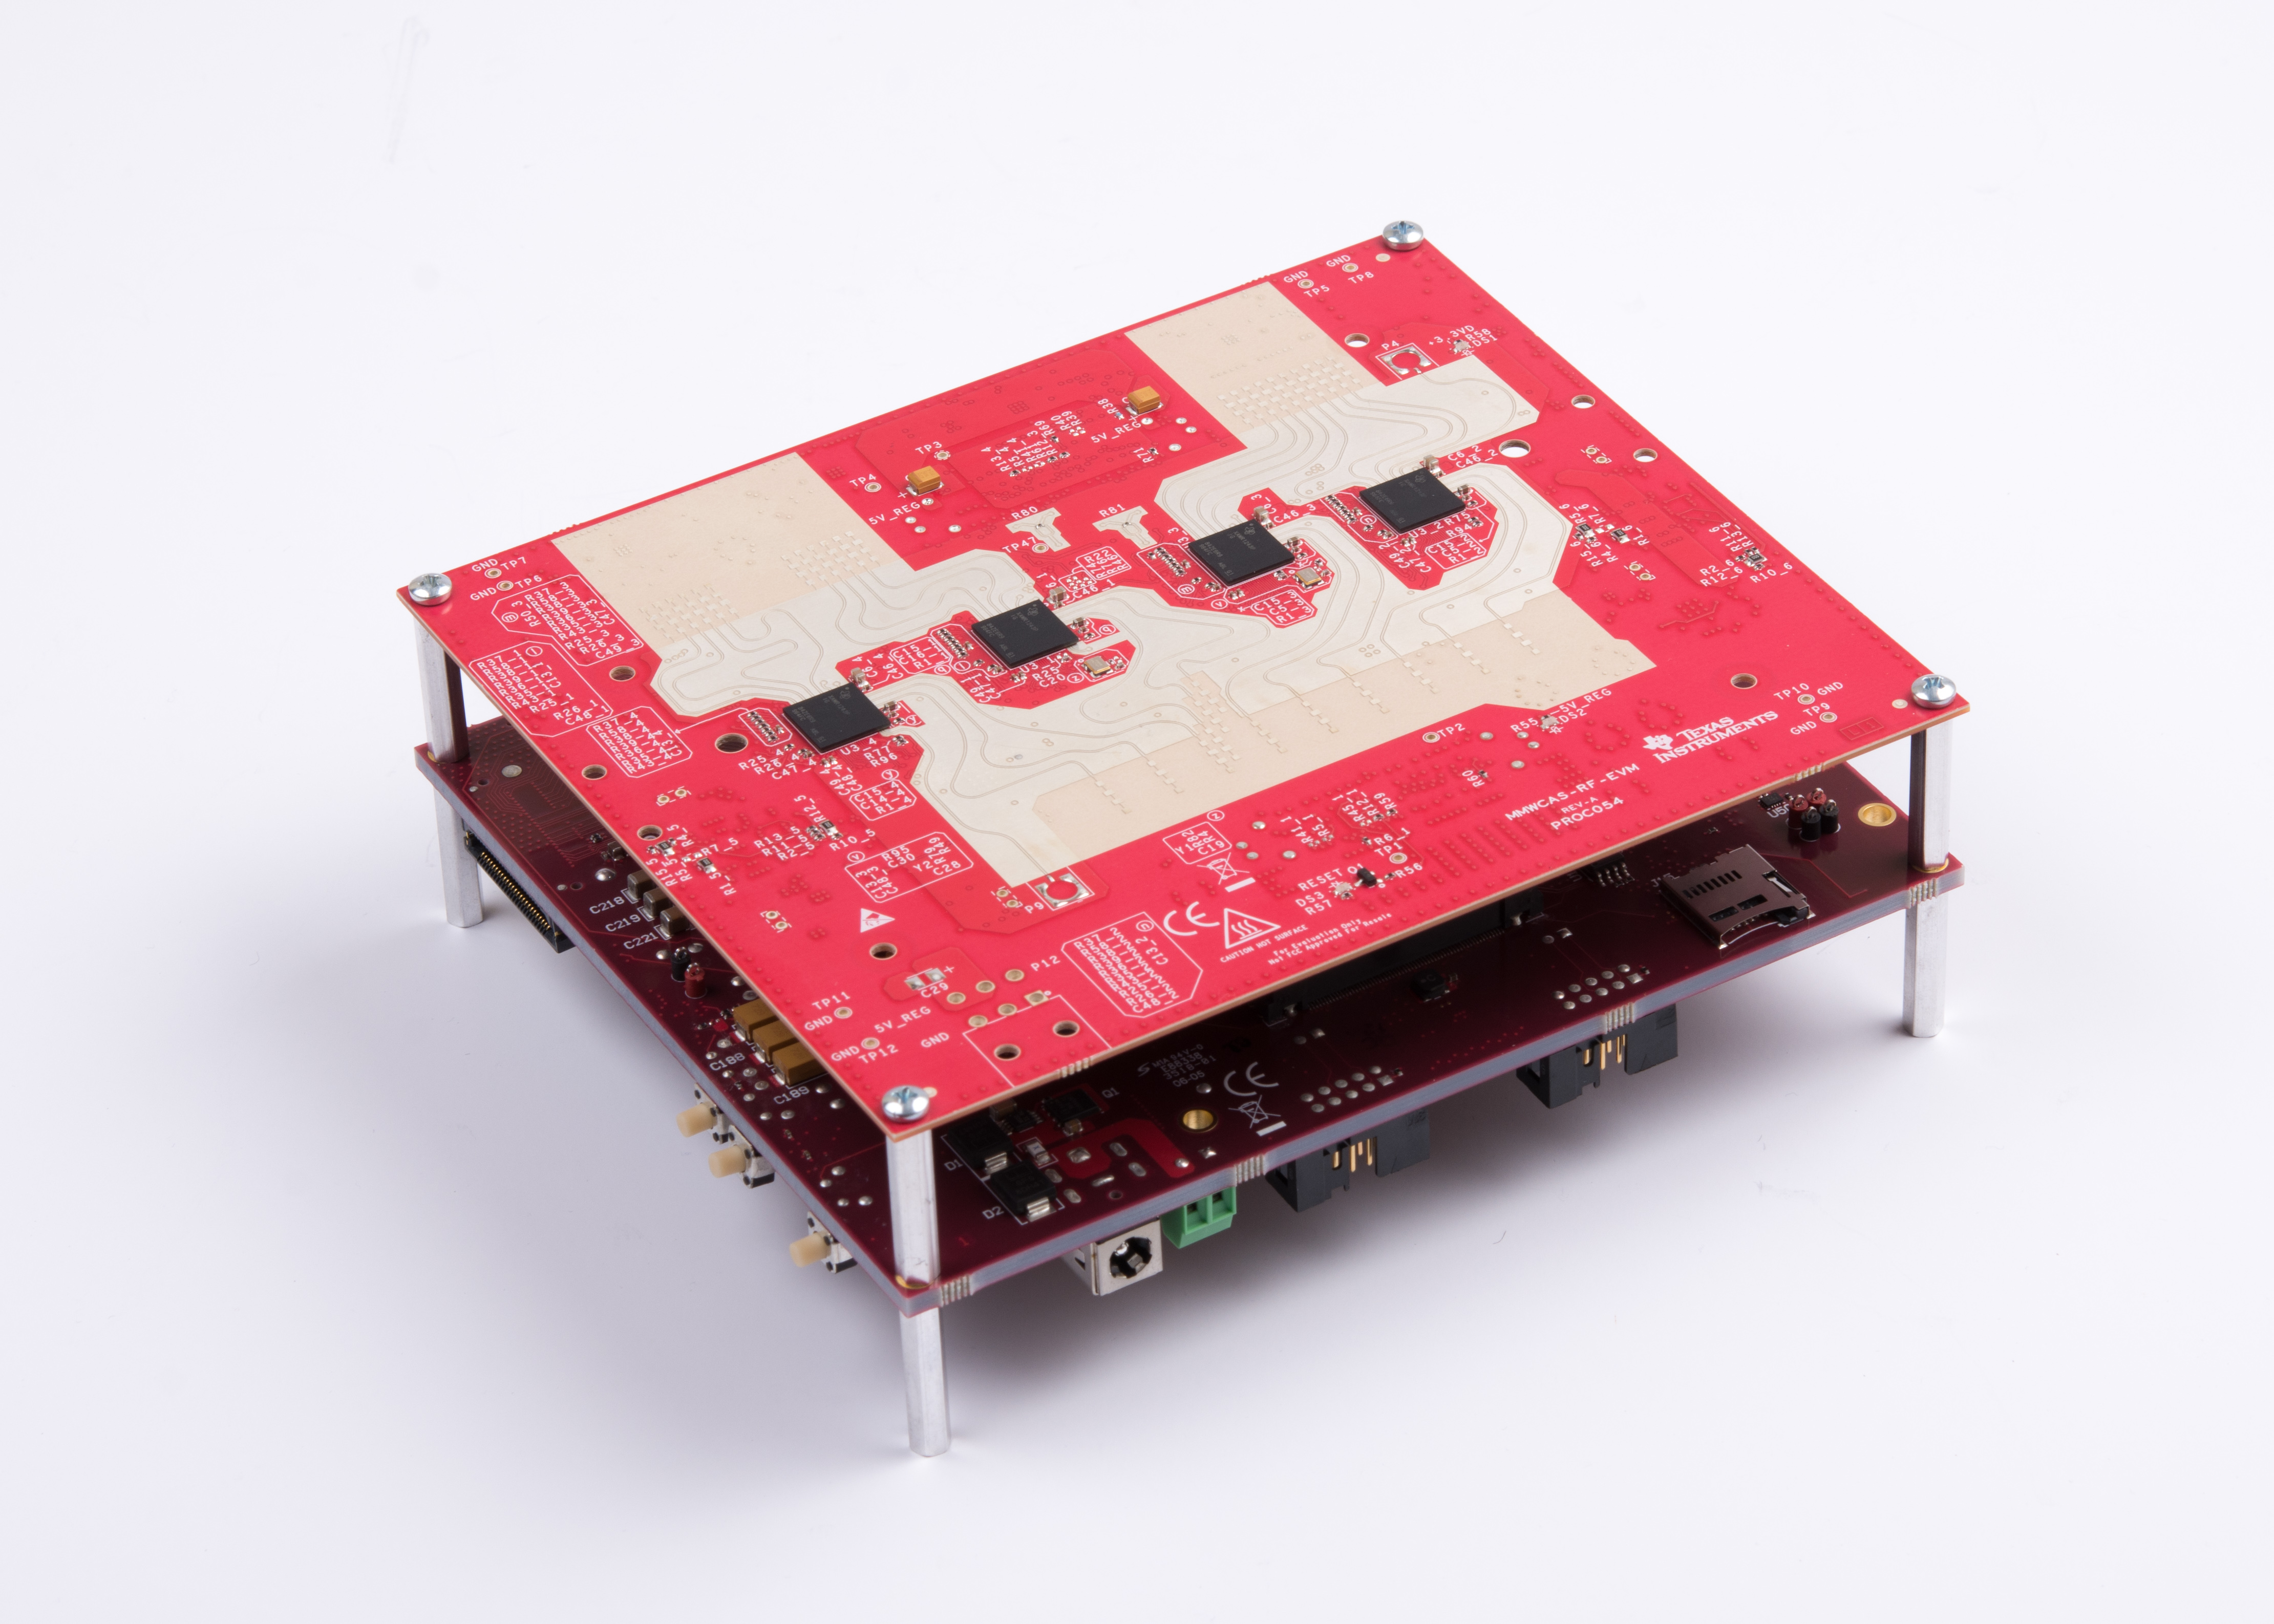
The MMWAVCAS-RF-EVM is designed to operate attached to the companion MMWAVCAS-DSP-EVM host board. The MMWAVCAS-DSP-EVM host board provides 5.0 V power and all necessary control signals to reset, boot and loadAWRx firmware.
The two boards are attached and aligned through the the Host Board Connector #1 (J4) and Host Board Connector #2 (J5). These two connectors are keyed to prevent incorrect, 180°, opposite orientation. Also, the four corner mounting holes and the overall board outlines match between the MMWAVCAS-RF-EVM and MMWAVCAS-DSP-EVM host board. Simply depressing the J4 and J5 connectors into their opposing connector pairs on the MMWAVCAS-DSP-EVM will connect the two EVM. Additional 25 mm mounting stand-offs and screws should be used to secure the two boards together into a single assembly.
Section 2.5.1 discusses the host board connectors.
 Figure 5. MMWAVCAS-RF-EVM (top) attached to the MMWAVCAS-DSP-EVM (bottom)
 For additional information on the MMWAVCAS-DSP-EVM, see the MMWAVCAS-DSP-EVM User's Guide on the associated technical documents collateral.