SNLU232A August 2018 – May 2019
-
1DS90UH949A-Q1EVM or DS90UB949A-Q1EVM User's Guide
- 1.1 General Description
- 1.2 Features
- 1.3 System Requirements
- 1.4 Contents of the Demo Evaluation Kit
- 1.5 Applications Diagram
- 1.6 Typical Configuration
- 1.7 Quick Start Guide
- 1.8 Default Jumper Settings
- 1.9 Default Switch Settings
- 1.10 Demo Board Connections
- 1.11
ALP Software Setup
- 1.11.1 System Requirements
- 1.11.2 Download Contents
- 1.11.3 Installation of the ALP Software
- 1.11.4 Start-Up - Software Description
- 1.11.5 Information Tab
- 1.11.6 HDMI Tab
- 1.11.7 Pattern Generator Tab
- 1.11.8 Registers Tab
- 1.11.9 Registers Tab - Address 0x00 Selected
- 1.11.10 Registers Tab - Address 0x00 Expanded
- 1.11.11 Scripting Tab
- 1.12 Troubleshooting ALP Software
- 1.13 Typical Connection and Test Equipment
- 1.14 Equipment References
- 1.15 Cable References
- 2Bill of Materials
1.11.4 Start-Up - Software Description
Make sure all the software has been installed and the hardware is powered on and connected to the PC. Execute “Analog LaunchPAD” shortcut from the start menu. The default start menu location is under All Programs → Texas Instruments → Analog LaunchPAD vx.x.x → Analog LaunchPAD to start MainGUI.exe.
 Figure 1-4 Launching ALP
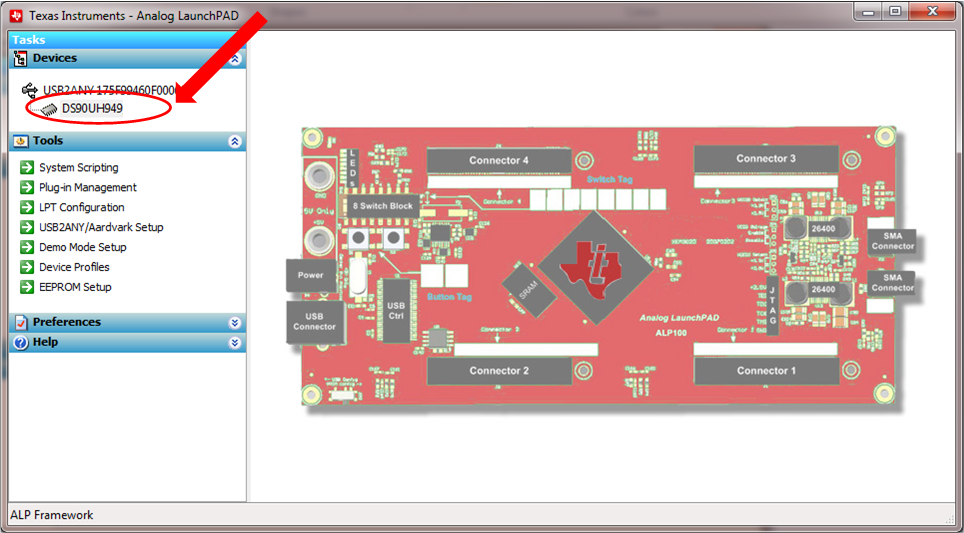
 The application should come up in the state shown in Figure 1-5. If it does not, see Section 1.12, “Troubleshooting ALP Software”.
NOTE
The ALP window graphics in this document show "DS90UH949", and the document text refers to the DS90Ux949. Replace the "DS90Ux949" text with "DS90UH949" if you have the DS90UH949A-Q1EVM or "DS90UB949" if you have the DS90UB949A-Q1EVM.
Under the Devices tab, select “DS90UH949” for the DS90UB949A-Q1EVM or "DS90UB949" for the DS90UB949A-Q1EVM to open up the device profile with its associated tabs.
 Figure 1-5 Initial ALP Screen
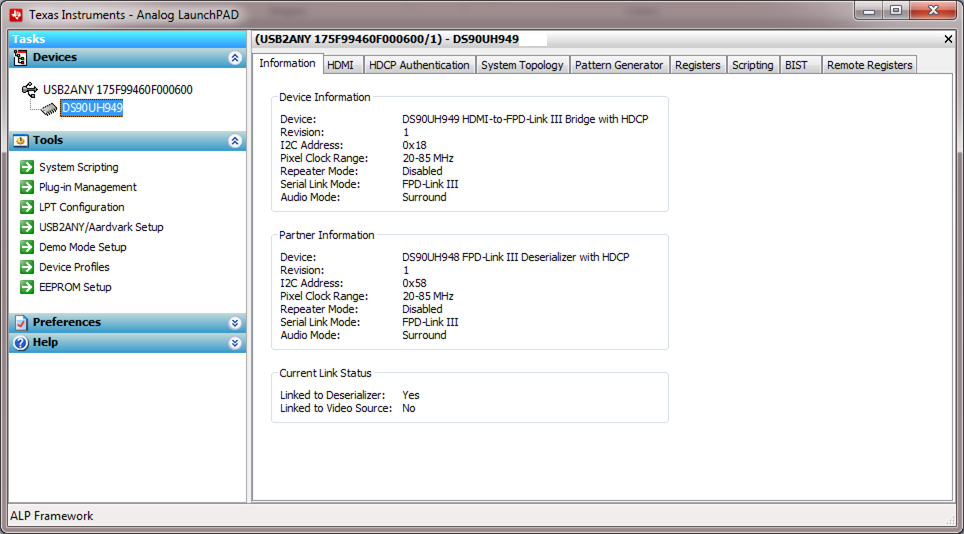
 After selecting the DS90Ux949, the screen shown in Figure 1-6 should appear.
 Figure 1-6 Follow-Up Screen