SWRU497B August 2019 – December 2021 CC2564C
6.2 Building and Flashing the Bluetooth Code (MSP-EXP432P401R)
Sample applications are available for CCS, IAR, and Keil. To set up the sample applications on each IDE version, do as follows:
CCS
- Navigate to the workspace through Project → Import CCS Projects.
- Open C:\TI\Connectivity\CC256X BT\CC256x MSP432 Bluetopia SDK\4.2.x.x\Samples.
- Select the demonstration to load onto the device (for this example, the SPPDemo).
- Navigate to SPPDemo → CCS.
Note:
The CCS SPPDemo project opens (see Figure 6-1).
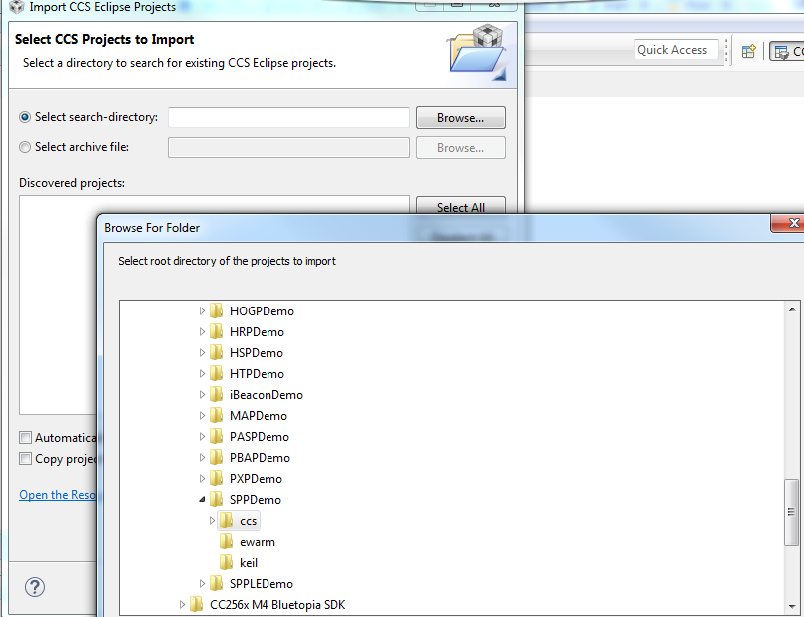 Figure 6-1 CCS Project Folder
 - Open Project → Properties → General, and ensure that the “Manage the project’s target-configuration automatically” checkbox is set. See Figure 6-2.
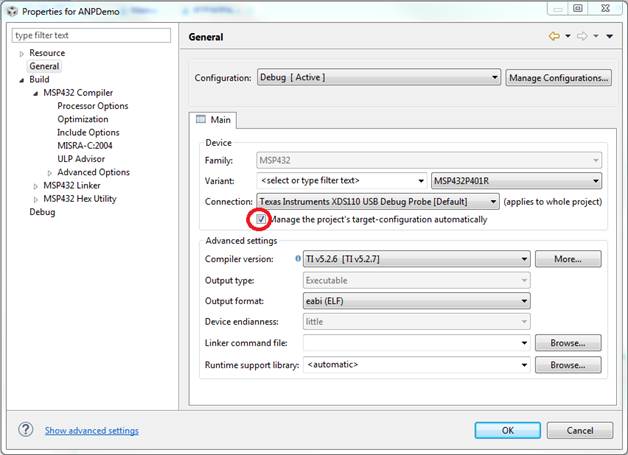 Figure 6-2 Project Properties / General
 - Ensure the MSP432 device is connected.
- Select the debug icon from the toolbar (see Figure 6-3).
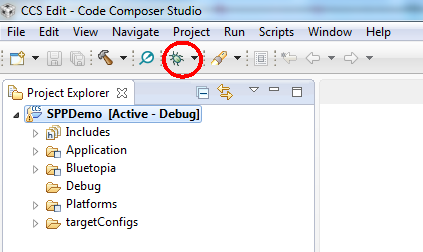 Figure 6-3 Debug IconNote:
Let the IDE debug and load the software onto the device. This process may take 5 to 10 minutes. After the IDE loads the software, the it is ready to use.
To begin using the profile, do as follows:
- Click the play and resume icon on the CCS toolbar (see Figure 6-4).
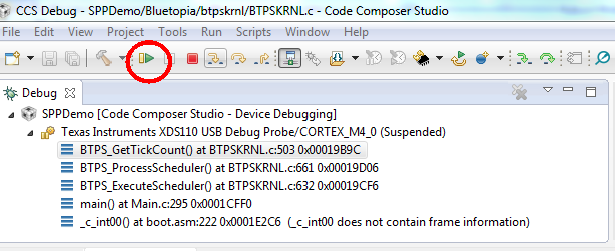 Figure 6-4 Play and Resume Icon
IAR
To open the workspace, do as follows:
- Navigate to C:\TI\Connectivity\CC256X BT\CC256x MSP432 Bluetopia SDK\4.2.x.x\Samples.
- Select the demonstration to load onto the device (for this example, the SPPDemo).
- Navigate to SPPDemo → EWARM.
- Select SPPDemo.eww.
Note:
The IAR IDE opens.
- Select either the Debug or Release configuration from the drop-down menu (in this example, select Debug, see Figure 6-5).
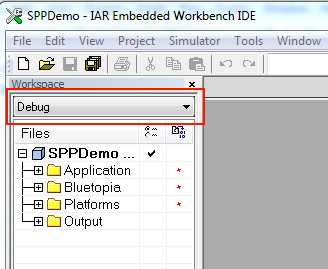 Figure 6-5 Debug Workspace
 - Ensure that the MSP-EXP432P401R LaunchPad development kit is connected.
- Select Download and Debug from the Project tab or the play icon (see Figure 6-6).
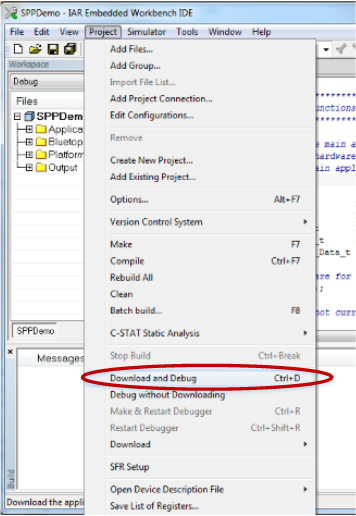 Figure 6-6 Download and DebugNote:
Let the IDE debug and load the software onto the device. This process may take 5 to 10 minutes.
- Click the red X icon in the IAR toolbar to stop debugging (see Figure 6-7).
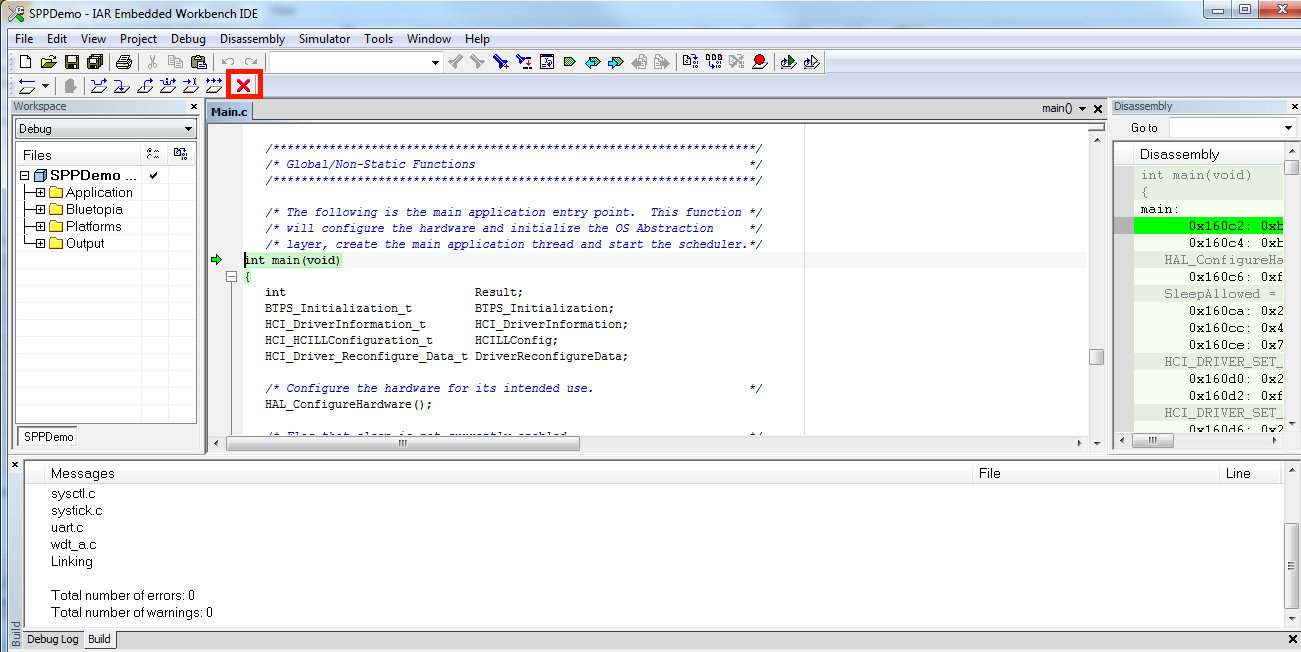 Figure 6-7 Red X
To begin using the profile, do as follows:
- Click the Go icon in IAR (see Figure 6-8).
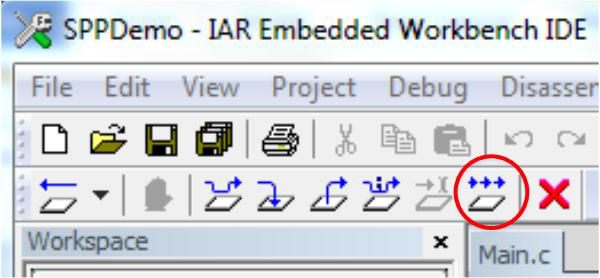 Figure 6-8 The Go Button
Keil
To open the workspace, do as follows:
- Navigate to C:\TI\Connectivity\CC256X BT\CC256x MSP432 Bluetopia SDK\4.2.x.x\Samples.
- Select the demonstration to load on the device (for this example, use SPPDemo).
- Navigate to SPPDemo → Keil in the samples list.
- Select SPPDemo.uvprojx.
Note:
Keil µVision5 opens.
- Select either the Debug or Release configuration from the drop-down menu (in this example, select Debug, see Figure 6-9).
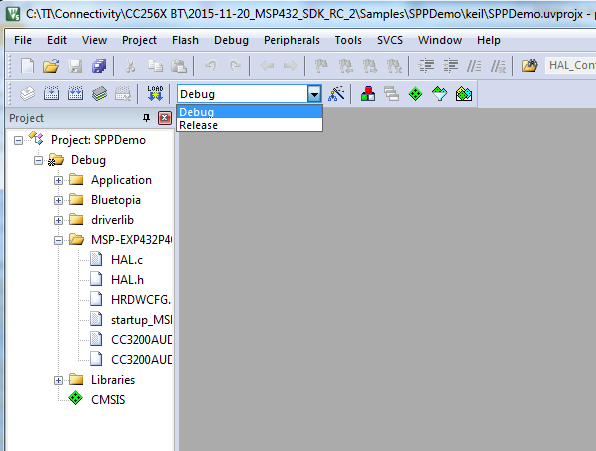 Figure 6-9 Configurations
To build the code, do as follows:
- Navigate to Project → Build Target in the program menu (see Figure 6-10).
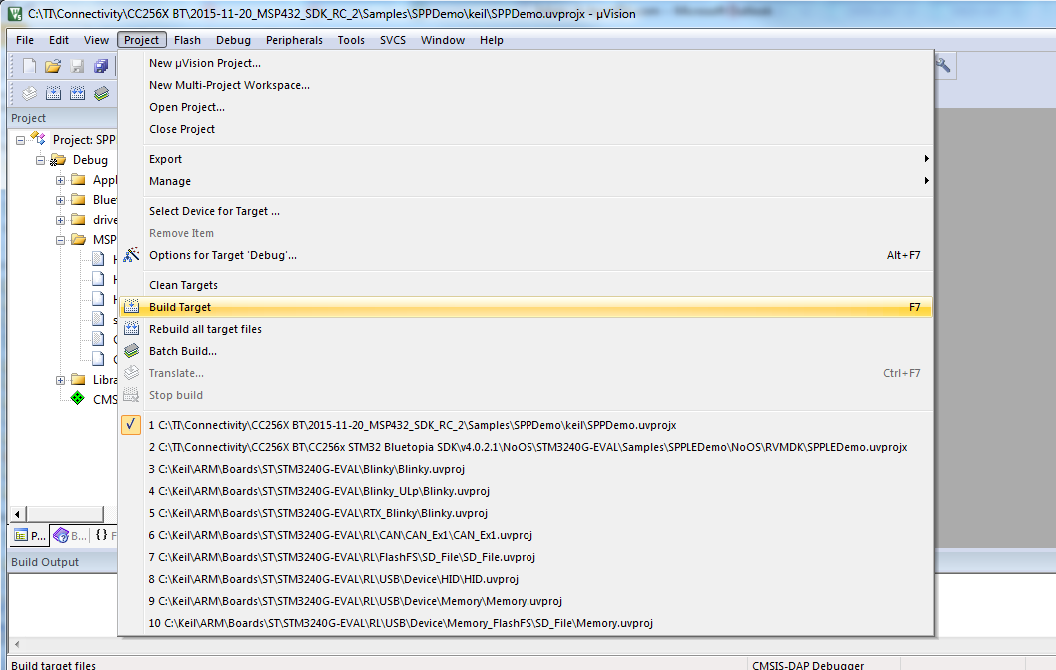 Figure 6-10 Build Project → TargetNote:
After a few minutes, the build process finishes and should build a .axf file. Each time the configuration is changed, a new .axf file must be built.
- Choose from the following two options.
- For Debug Mode Only, do as follows:
- Select Start/Stop Debug Session to start loading the profile on the MSP432 device (see Figure 6-11).
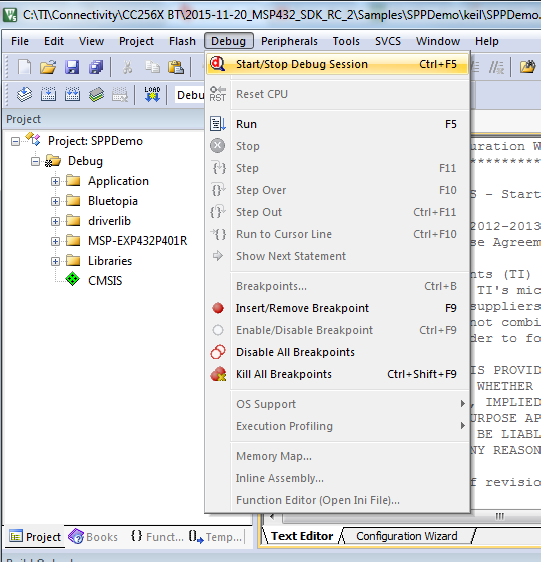 Figure 6-11 Start/Stop Debug SessionNote:
The debug session finishes in a few minutes.
- Stop the debugging session from the Debug menu.
Note:
The profile loads on the MSP-EXP432P401R LaunchPad development kit.
- Unplug the device.
- Plug in the device.
- Select Start/Stop Debug Session to start loading the profile on the MSP432 device (see Figure 6-11).
- For Release and Debug Modes:
- Press the LOAD icon to start loading the profile on the MSP432 device (see Figure 6-12).
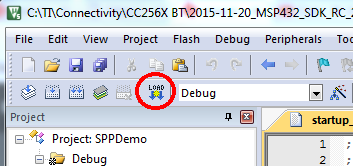 Figure 6-12 LOAD ButtonNote:
The profile finishes in a few minutes. The profile loads on the MSP-EXP432P401R LaunchPad development kit.
- Unplug the device.
- Plug in the device.
- Press the LOAD icon to start loading the profile on the MSP432 device (see Figure 6-12).
- For Debug Mode Only, do as follows: