SLAA891B April 2019 – February 2020 MSP430FR2512 , MSP430FR2512 , MSP430FR2522 , MSP430FR2522 , MSP430FR2532 , MSP430FR2532 , MSP430FR2533 , MSP430FR2533 , MSP430FR2632 , MSP430FR2632 , MSP430FR2633 , MSP430FR2633 , MSP430FR2672 , MSP430FR2672 , MSP430FR2673 , MSP430FR2673 , MSP430FR2675 , MSP430FR2675 , MSP430FR2676 , MSP430FR2676
2.2 Workflow
Slider, wheel, and touchpad sensors have geometric features of length, width, radii, angles, and clearances that must be considered when constructing a sensor. The reader is responsible to understand their sensor specifications before using these scripts, or the resulting output may not provide the optimal performance for an application. If you are not familiar with the construction of these various sensors, illustrations of the script parameters are shown starting in Section 3.
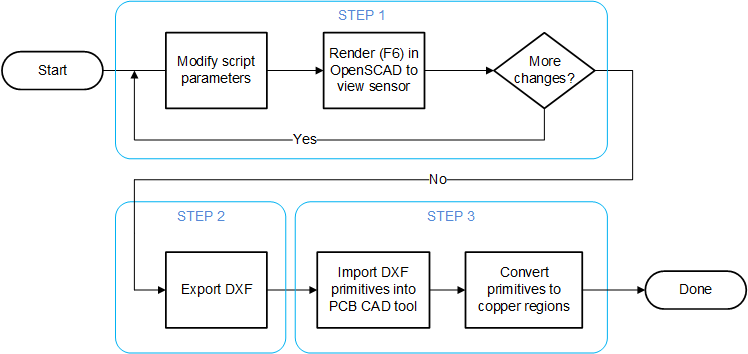
The process or workflow for creating a sensor requires three steps (see Figure 1):
- Modify the script and render (F6) the sensor.
- Export to DXF.
- Import into a PCB CAD tool and convert to a copper region.
