SLUA888 May 2018 TPS53622 , TPS53659 , TPS53679 , TPS53681
-
NVM Programming for VR13 Power Controllers
- Trademarks
- 1 Introduction
- 2 Technical Overview
- 3
Use of TI Programming Tools
- 3.1
Fusion Digital Power Designer
- 3.1.1 Build and Export a System (.tifsp) File
- 3.1.2 View a Project File or System File Offline
- 3.1.3 Import a Project File to a Single Online Device
- 3.1.4 Import a System File to an Online System
- 3.1.5 Export CSV Script for Third Party Tools
- 3.1.6 Compare Two Project Files
- 3.1.7 Build a System File from Existing Project Files
- 3.2 Fusion Manufacturing Tool
- 3.3 TI Programming Board
- 3.1
Fusion Digital Power Designer
3.1.3 Import a Project File to a Single Online Device
- Connect the USB-GPIO to a board.
- Apply 3.3 V to the V3P3 pin of the controller device.
- Start the Fusion Digital Power Designer software.
- From the System View window, Click to configure device
- From the File menu, select Import to device
- Select Project File
- Click Next.
- Click Select All to import all parameters of the device.
- Click Write Checked.
- When the Project file import finishes, the software does not automatically issue an NVM store operation command. You must click Store Config to NVM to update NVM settings after you import a Project file.
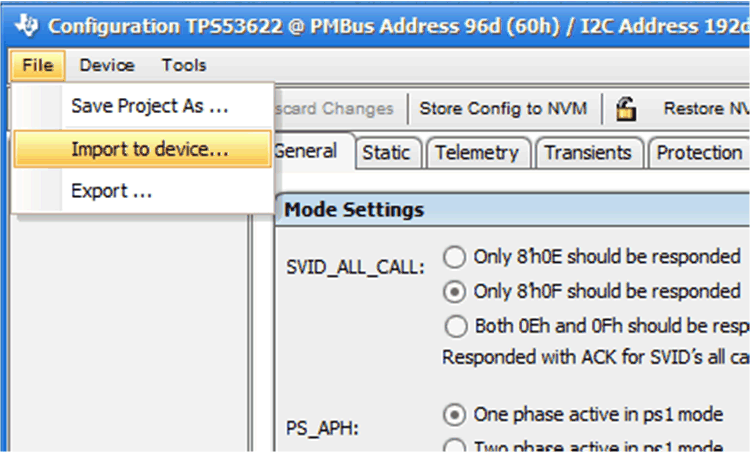 Figure 19. Import to Devcie
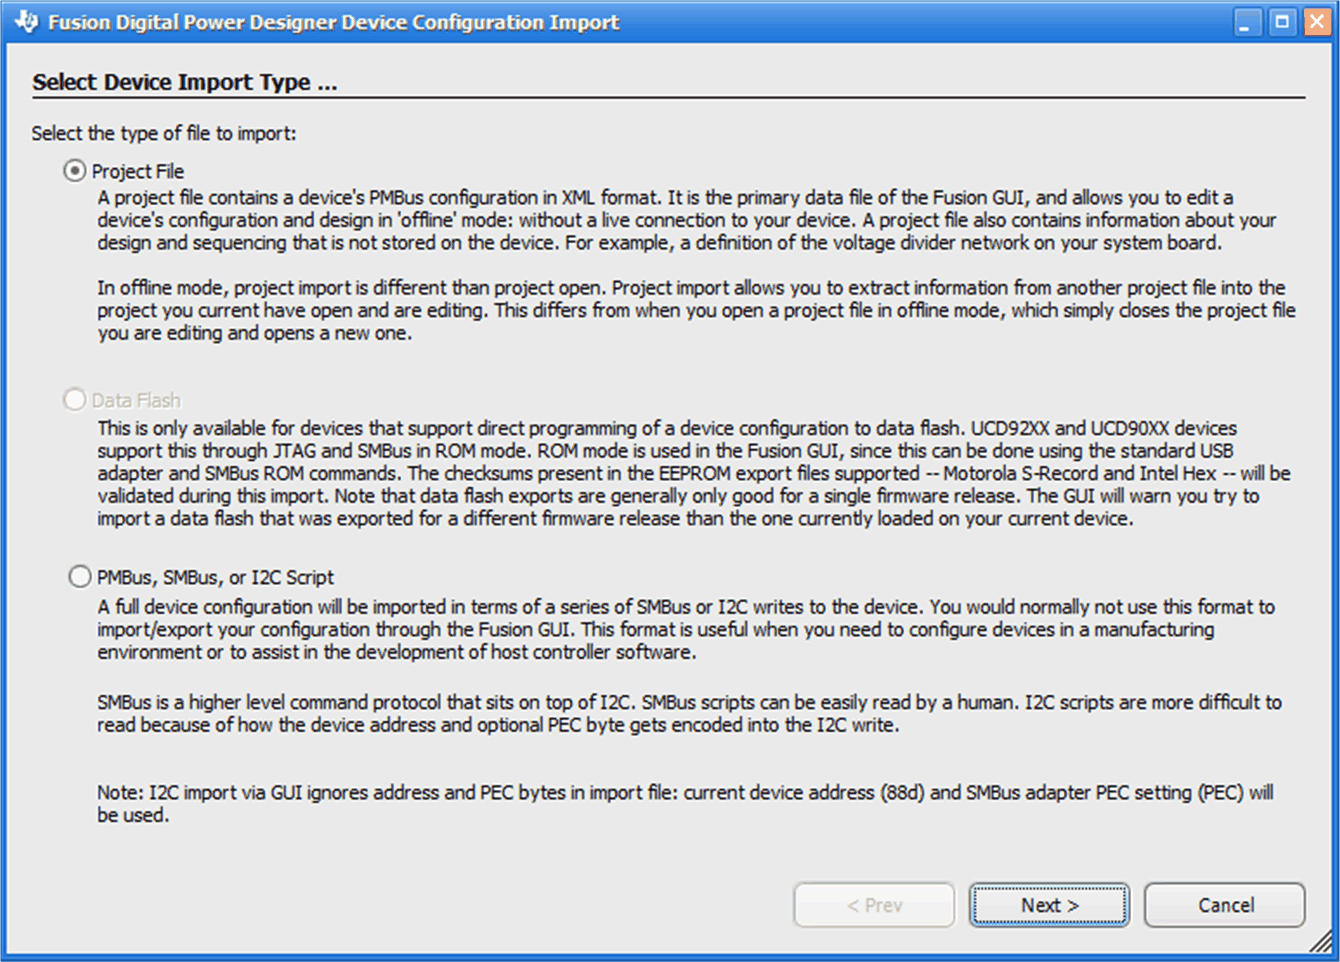 Figure 20. Import Project File
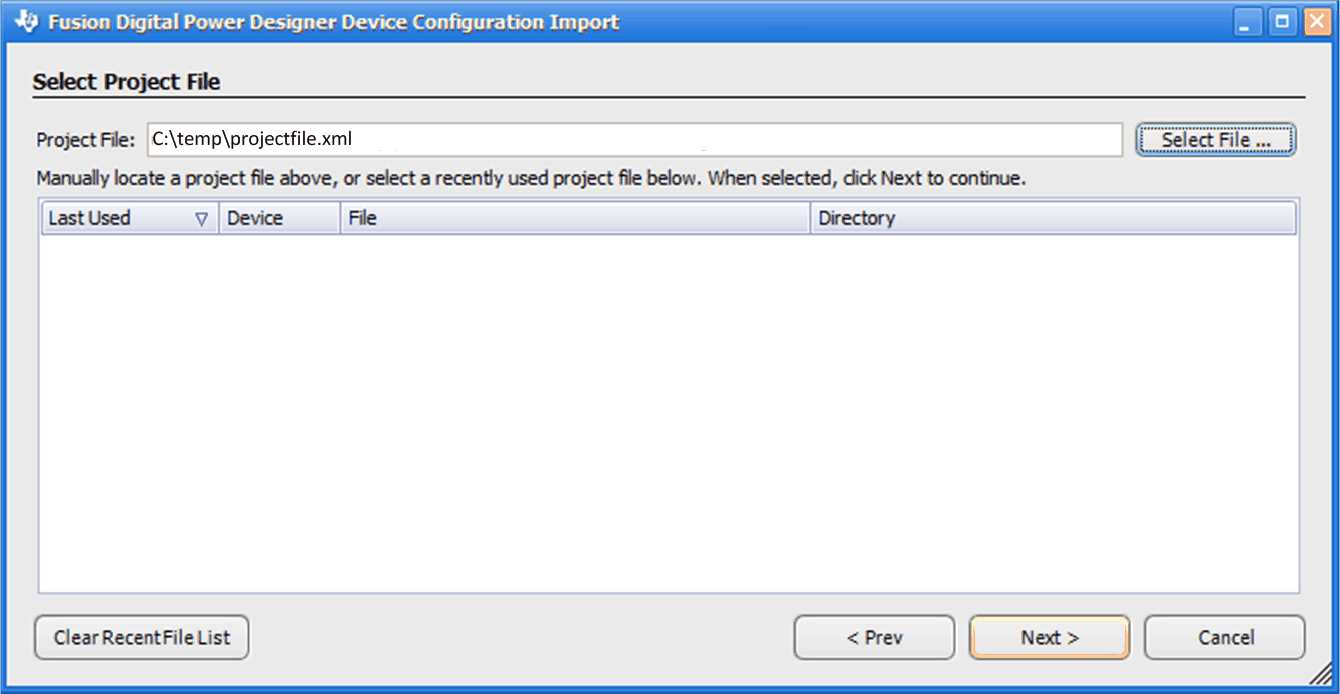 Figure 21. Select Project File
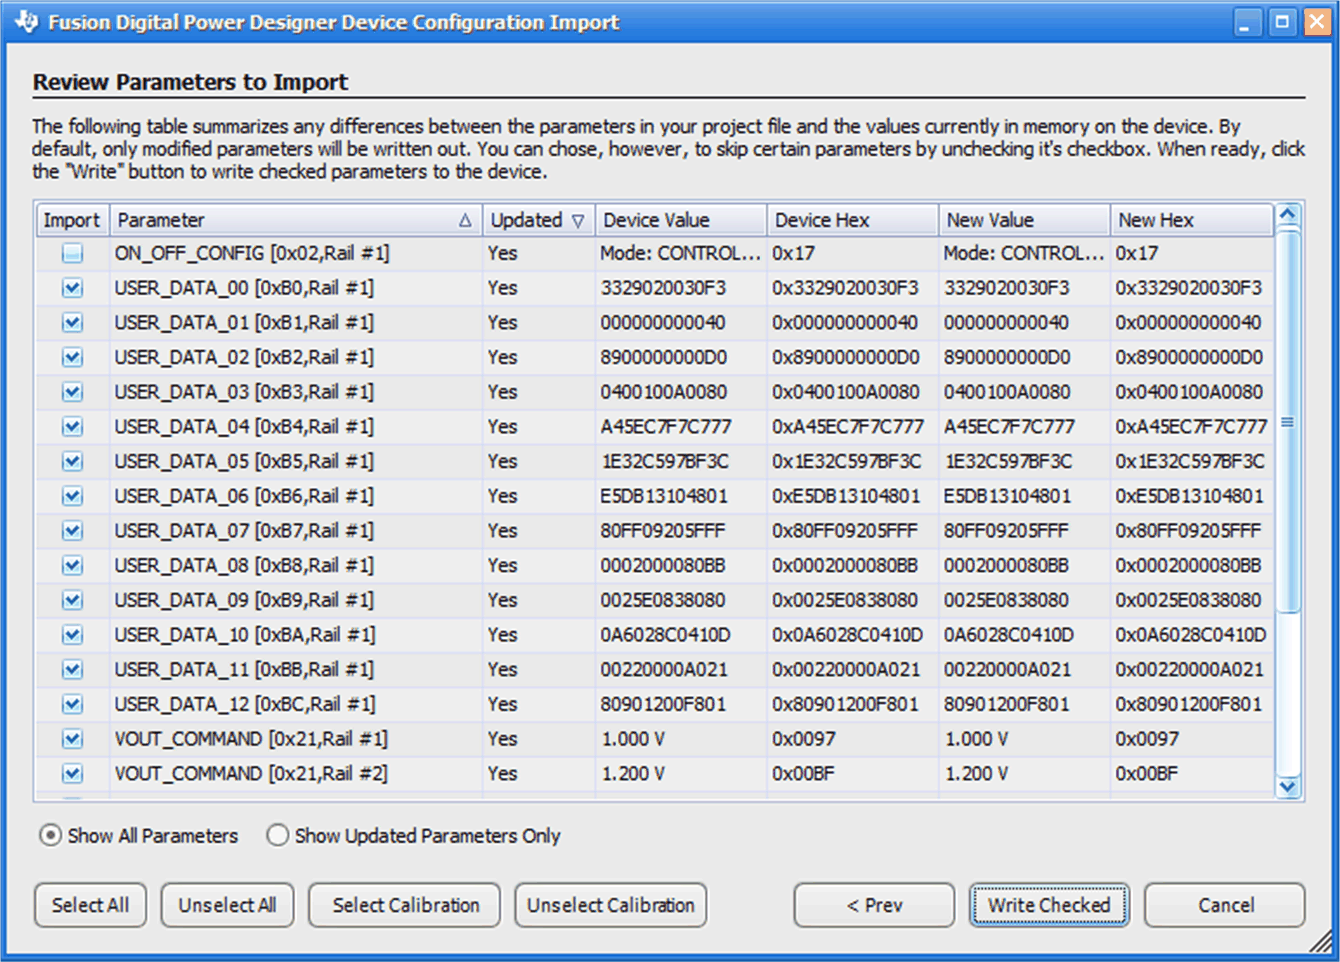 Figure 22. Select All and Write Checked Parameters
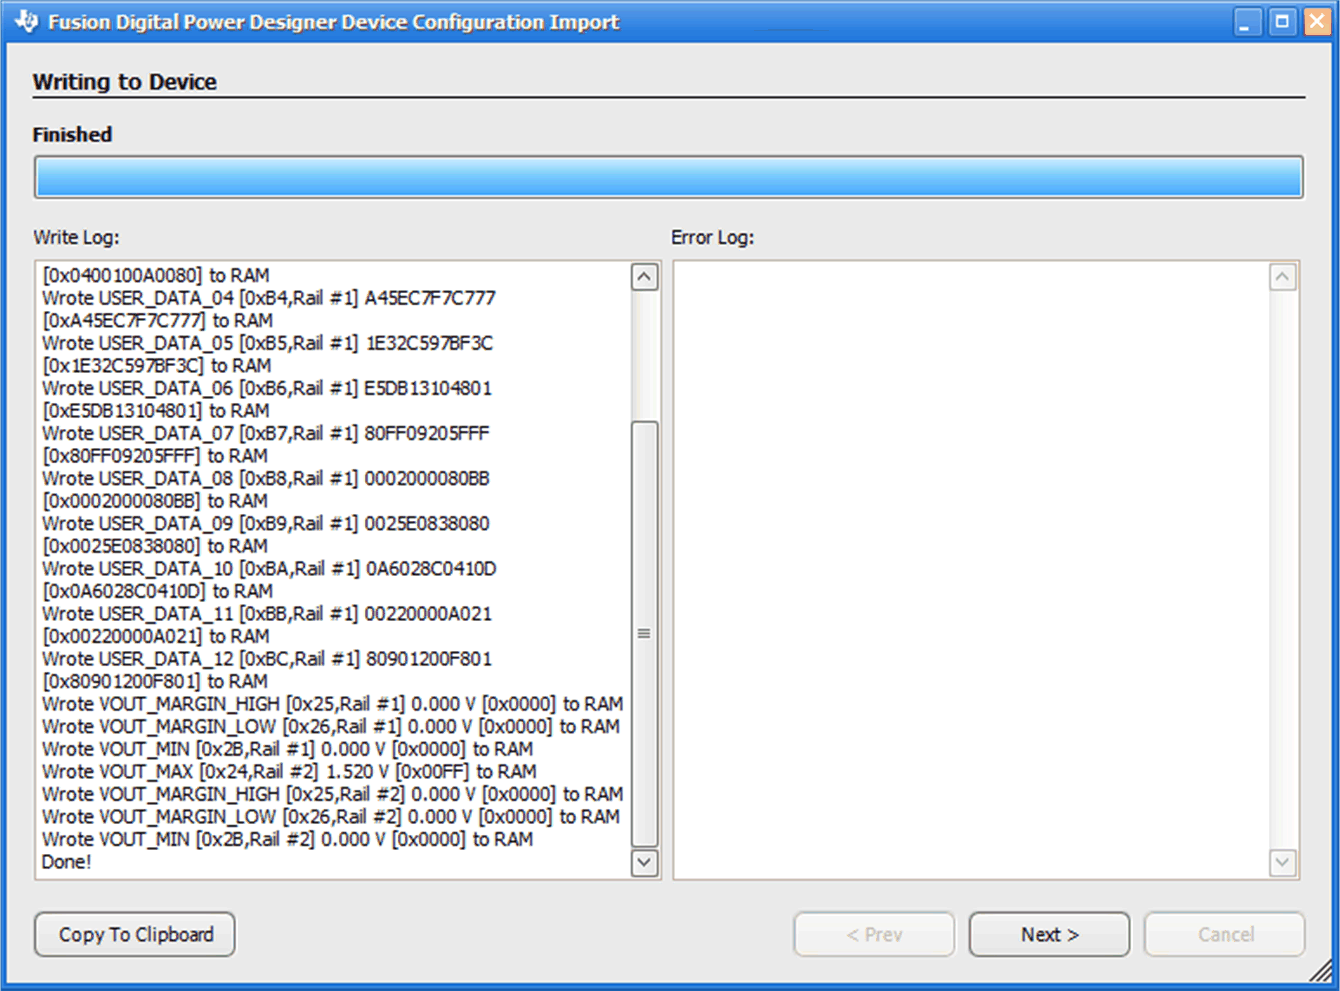 Figure 23. Successful Project File Import
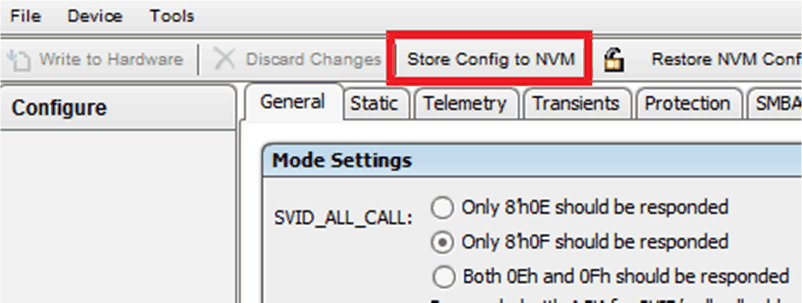 Figure 24. Store to NVM