SLVUCG6 November 2022 TPS650350-Q1
- TPS650350-Q1 EVM User's Guide
- Trademarks
- 1 Introduction
- 2 Requirements
- 3 Operation Instructions
- 4 EVM Configurations
- 5 Test Points
- 6 Graphical User Interface
- 7 Typical Performance Plots
- 8 TPS650350-Q1 EVM Schematic
- 9 TPS650350-Q1 EVM PCB Layers
- 10TPS650350-Q1 EVM Bill of Materials
6.1.1 I2C Communication Port and Adapter Debugging
By default, the GUI recognizes two serial ports from the EVM adapter, but may not select the I2C bridge automatically. Once the EVM is powered and the USB cable is connected to the computer, click the connect icon at the bottom left of the GUI. If the bottom notification updates to Hardware Not Selected:
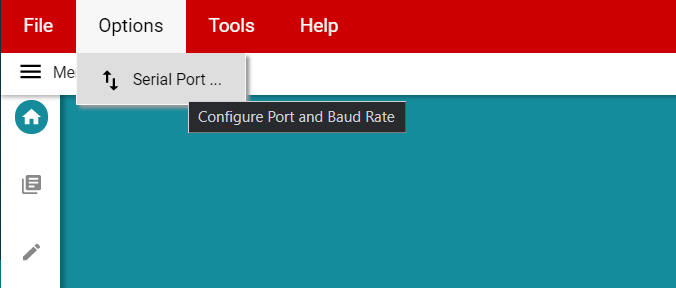
- Click the Options menu at the top of the GUI, select Serial Port.
 Figure 6-2 Opening Serial Port Options
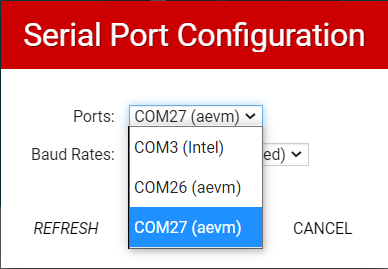
 - Use the Ports dropdown to select the alternative interface.
 Figure 6-3 Selecting an Alternate Port
After clicking OK, the GUI connects to the device properly. If communication to the EVM is lost, most issues can be resolved by pressing the nRST_MCU button (S3) on the EVM. Afterwards, further issues can be diagnosed by confirming that MCU_IN (J18) is still present, and that the I2C pull-up domain is still active.