SNLA398 October 2022 DS320PR810
2 Low Level Page
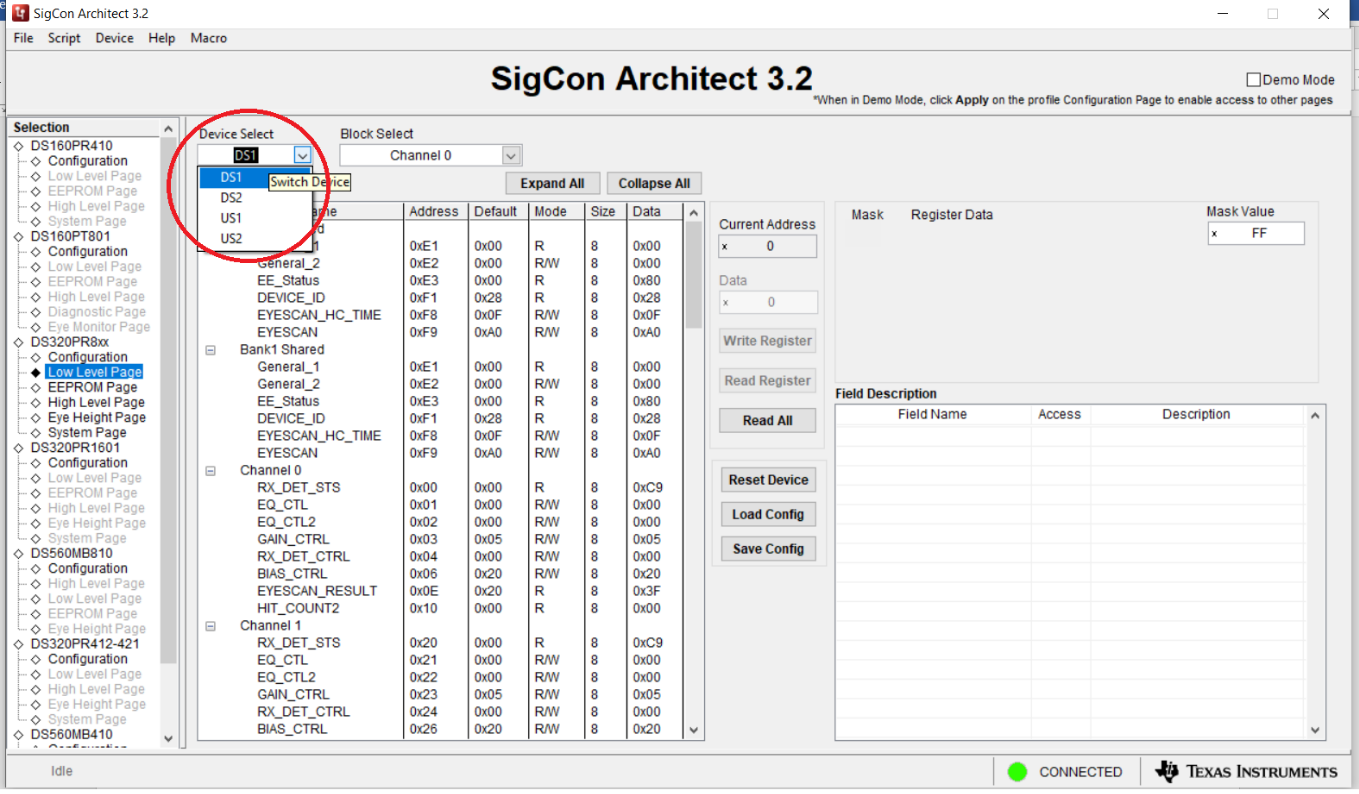
- Use the Device Select
drop-down menu to select which device you want to read or write to. The
DS320PR810EVM includes two upstream and two downstream devices.
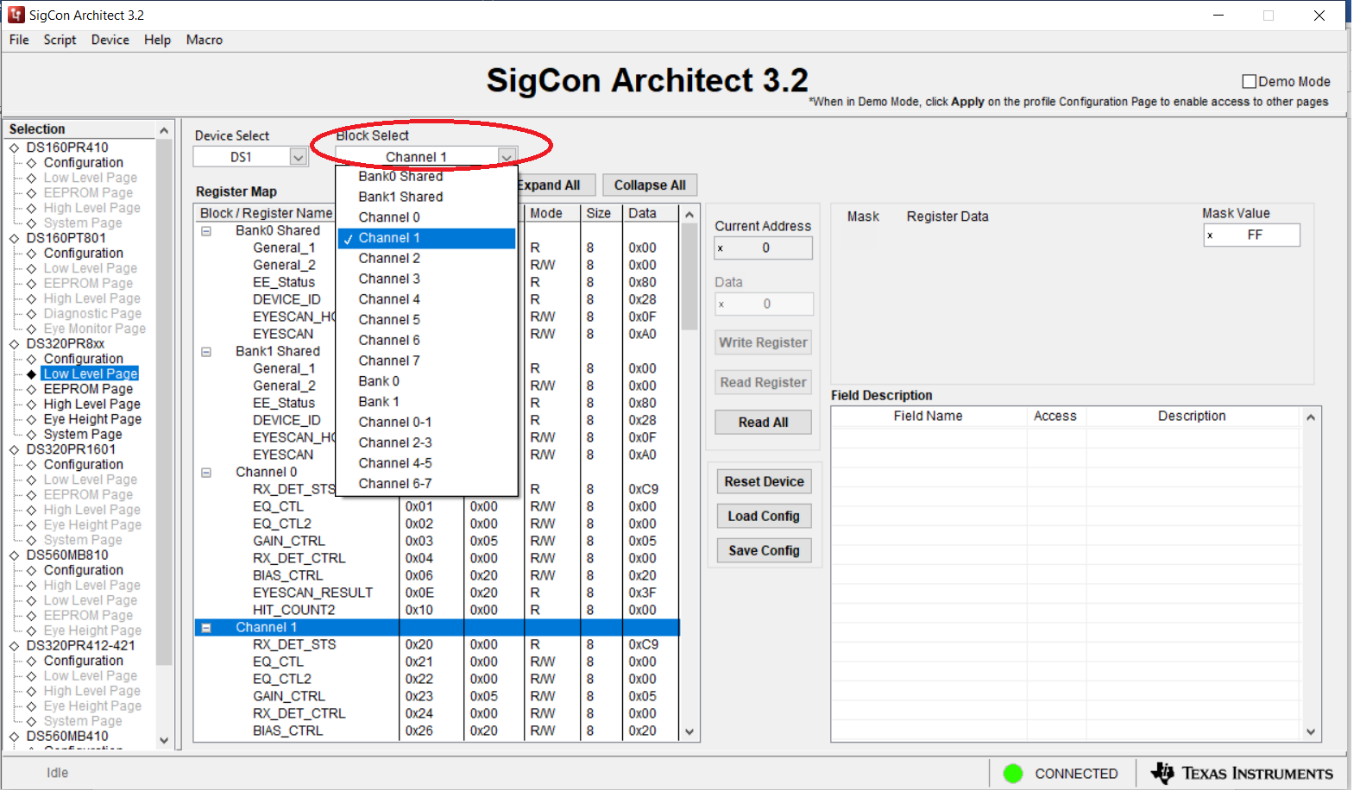
- Once the device is selected, the
complete register map appears in the table below. Use the Block Select
drop-down menu to jump to the desired part of the table to view specific
channels. Bank 0 includes channels 0-3 and Bank 1 includes channels 4-7.
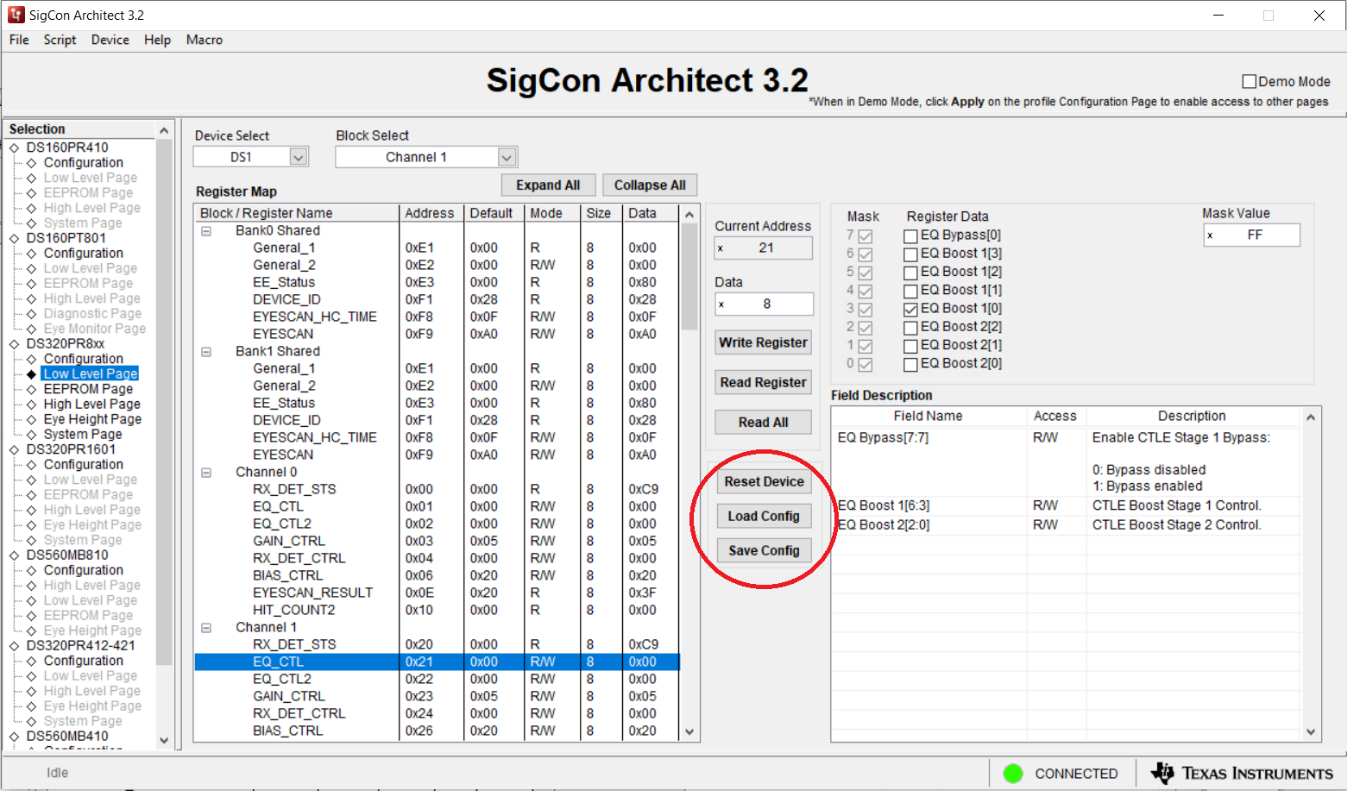
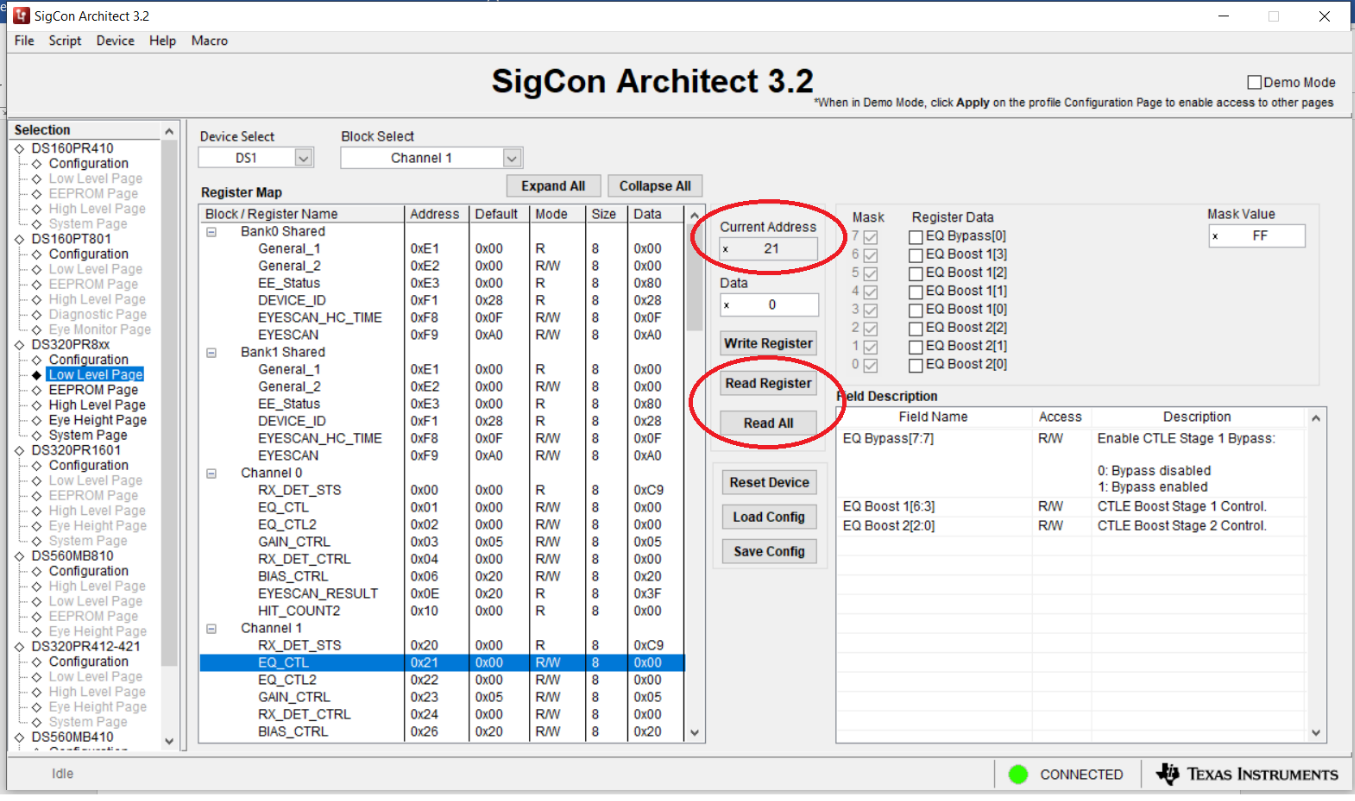
- Click the Read All button
to read the configuration of the entire device. Alternately, click on a specific
register, and click the Read Register device to update the target
register quicker. The current address field will automatically update with the
highlighted register.
- To write to the selected
register, check or deselect the boxes in the Register Data field, or
manually enter a hex value into the Data field. Then, click the Write
Register button. To verify the change was made, click the Read
Register button. Note the Field Description table describes the
function of each bit in the highlighted register.
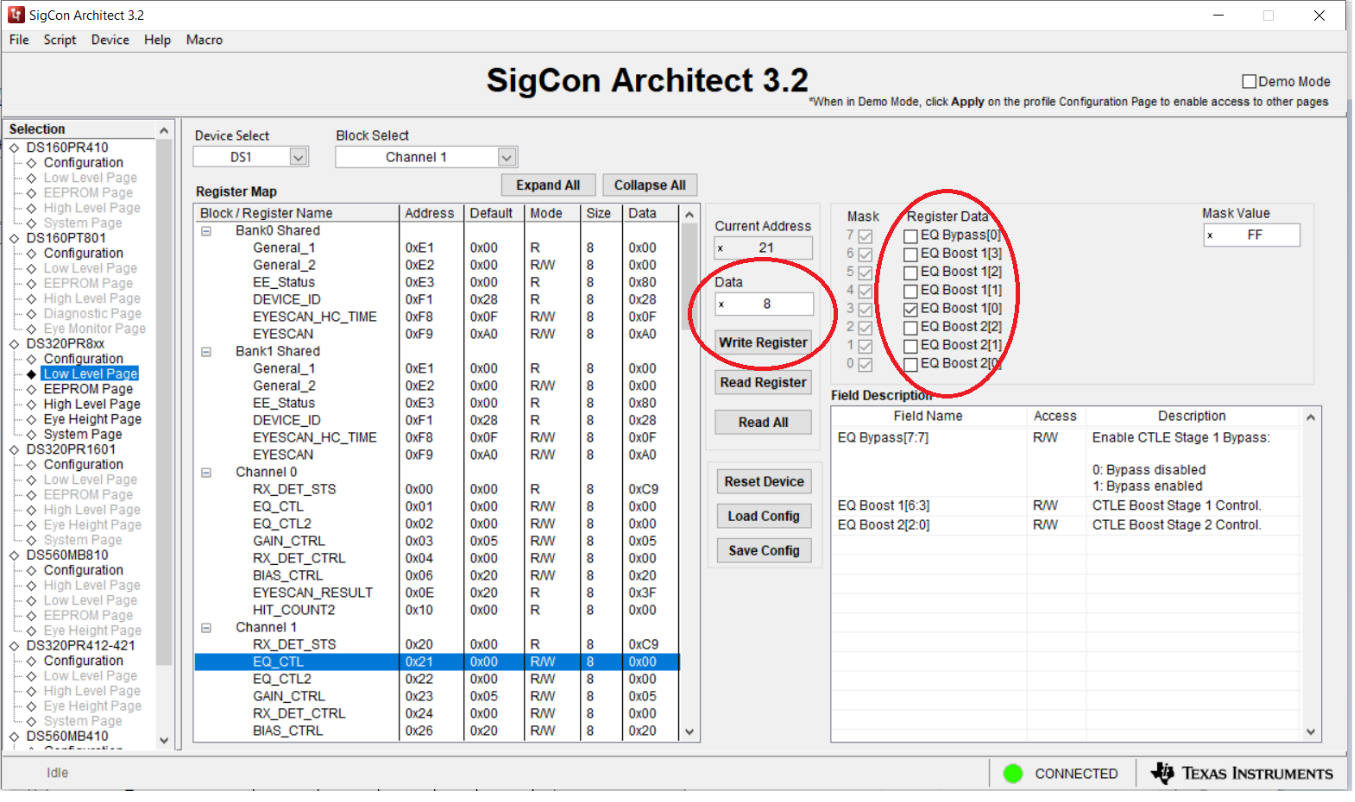
- Use the Save Config and
Load Config buttons to save the current configuration in a .cfg file,
and load it back as needed. Click the Reset Device button to reset every
setting to the default.