SLUUCB4 June 2020
5.2 Current Limit Test
Use the following instructions to perform current limit test:
- Place jumper J9 in 3-4 Position to set 2 ms for ITIMER.
- Set the input supply voltage VIN to 12 V and current limit of 15 A and enable the power supply.
- Place jumper J10 in 7-8 Position to set 8 A current limit.
- Set the electronic load to 6 A and connect between VOUT and GND. Enable the electronic load.
- Now apply overload of 4 A (using resistive load of 3 Ohm) between VOUT and GND.
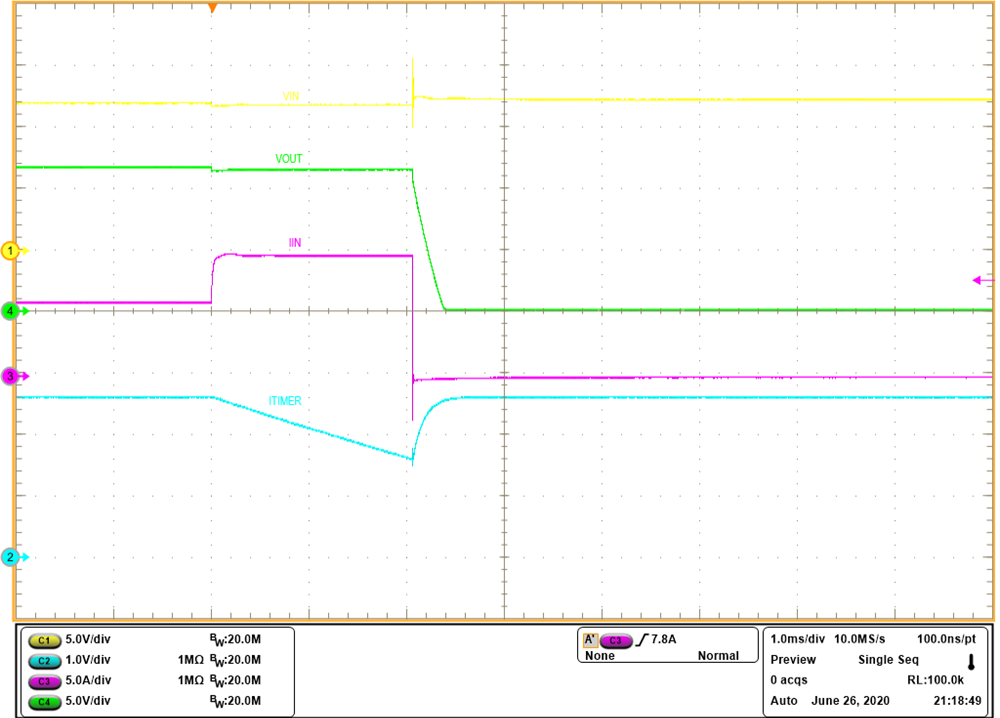
- The device allows the overload current for the programmed ITIMER period for example, 2 ms and then switches OFF.
- Place jumper J10 at other settings to test at various current limits.
Figure 4 shows an example of current limit at 8 A on the TPS25980EVM eFuse Evaluation Board.
 Figure 4. Over Current Response of TPS259804O for 8 A Current Limit Setting