SBAU412 November 2022 AFE7900 , AFE7903 , AFE7906 , AFE7920 , AFE7950
- Abstract
- Trademarks
- 1 Introduction
- 2 Prerequisites
- 3 Typical Bare-Metal Design Flow
- 4 Background
- 5 AFE SPI IP Container Pinout
- 6 TI AFE SPI IP Container
- 7 Create Block Designs With TI AFE SPI IP
- 8 Create New Platforms in Vitis
- 9 Create New Application Projects in Vitis
- 10Build Application Projects
- 11Configure the AXI GPIO
- 12Configure the AXI SPI
- 13Create Boot Images to Run on SD Card
- 14Set up and Power on Hardware
- 15Set up ZCU102 Board Interface for VADJ_FMC
- 16Debug Application Projects and Set up Vitis Serial Terminal
- 17Execute the Application
13 Create Boot Images to Run on SD Card
This section of steps is applicable only if there is a need to create a bootable SD Card. Skip these steps if not applicable.
To create a bootable SD Card with the active application, follow these steps:
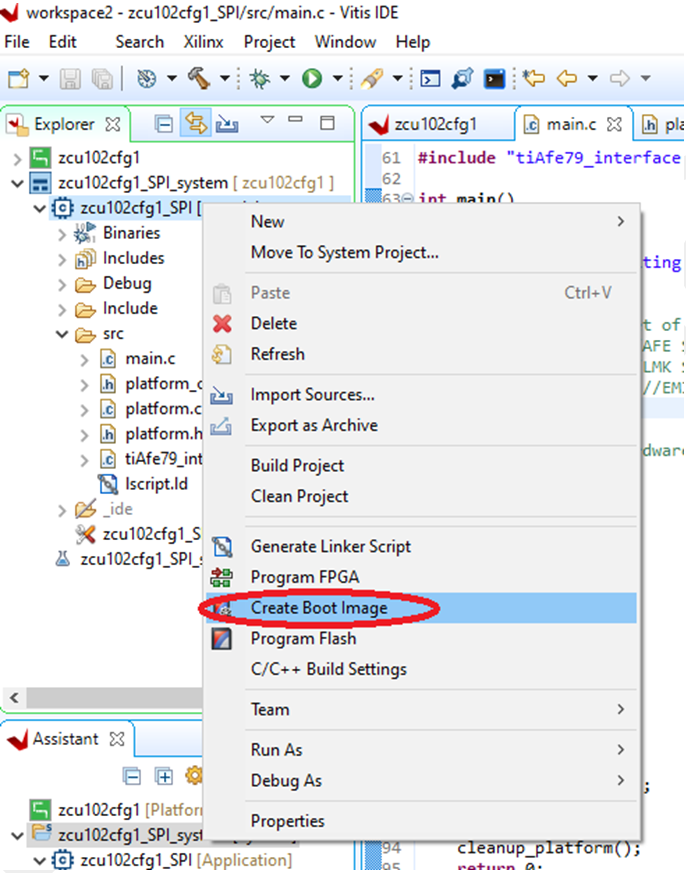
- Right-click the application name to open the drop-down menu and select Create Boot Image (see Figure 13-1).
 Figure 13-1 Creating Boot Image
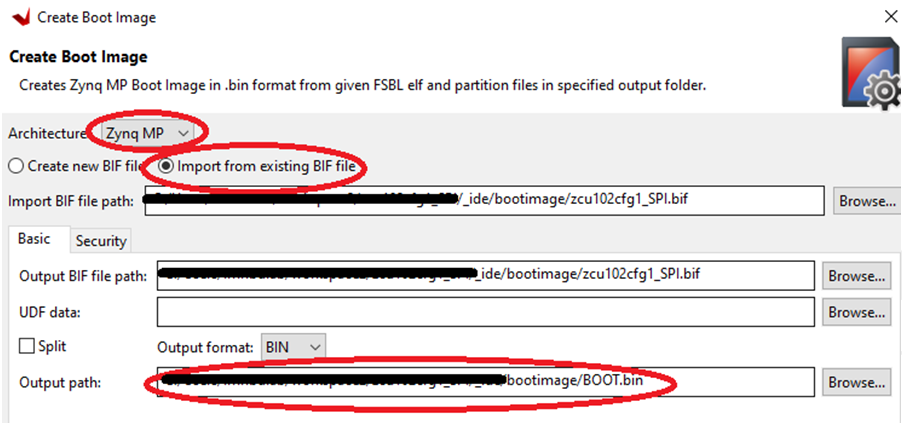
 - Select Zynq MP from the Architecture menu and select Import from existing BIF file option (see Figure 13-2).
The Output path shows the file location of the BOOT.bin to be generated.
 Figure 13-2 Boot Image Input and Output Pathnames
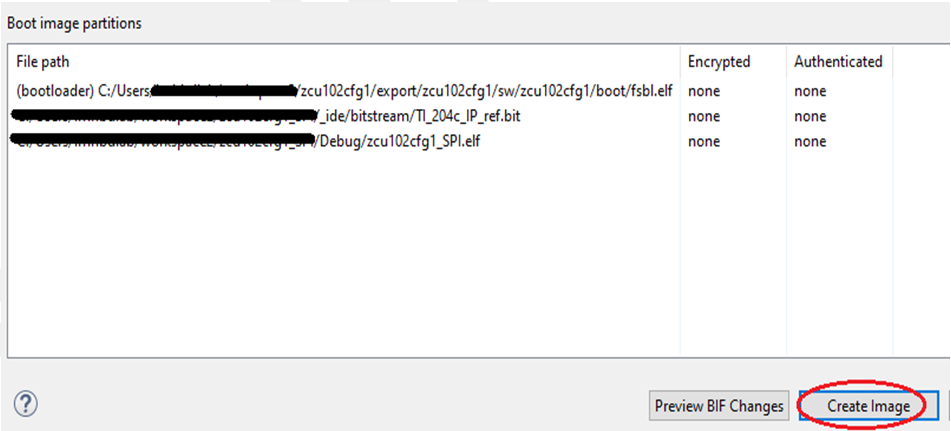
 - After reviewing the locations of the boot elf file, FPGA bit file, and application elf, click Create Image (see Figure 13-3).
 Figure 13-3 Boot Image Partitions
The above step generates the BOOT.bin in the output path as selected in Figure 13-2.
- Copy BOOT.bin to a FAT16 or FAT32 formatted SD Card.
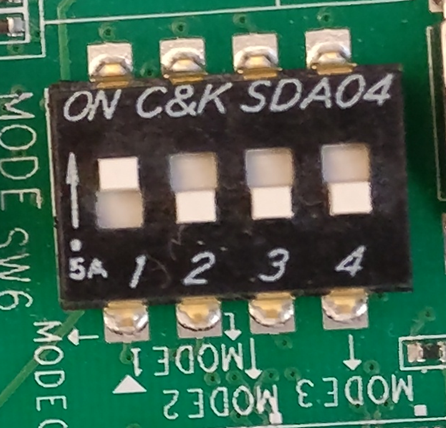
- To boot from SD Card, ensure the SW6 switch positions on the ZCU102 is as per Figure 13-4.
 Figure 13-4 SW6 Switch Positions
 - With the above setting on SW6 and SD card inserted, ZCU102 can now directly boot with the application.